
DIY Finishing an Unfinished Closet w/Access Panel
When I remodeled my bathroom, like so many contractors, I didn’t even bother to finish the closet that I completely destroyed. I managed to finish this project in about 2 days time and it turned out super nice. I did this to increase sqftage of the house before an appraisal. I’m refinancing, rates are too good. Too bad the appraiser didn’t even look at my closet 🙄. I wanted to add a nice access panel for anyone that does future work on the shower.
Total price: ~162$. Money Estimated saved from professional install: 700$
- 3/8s Drywall (2 slabs) - original construction was two 3/8s piled ontop of one another, so i continued the trend. - 11$
- Spackle - 7$
- Drywall Tape - 3$
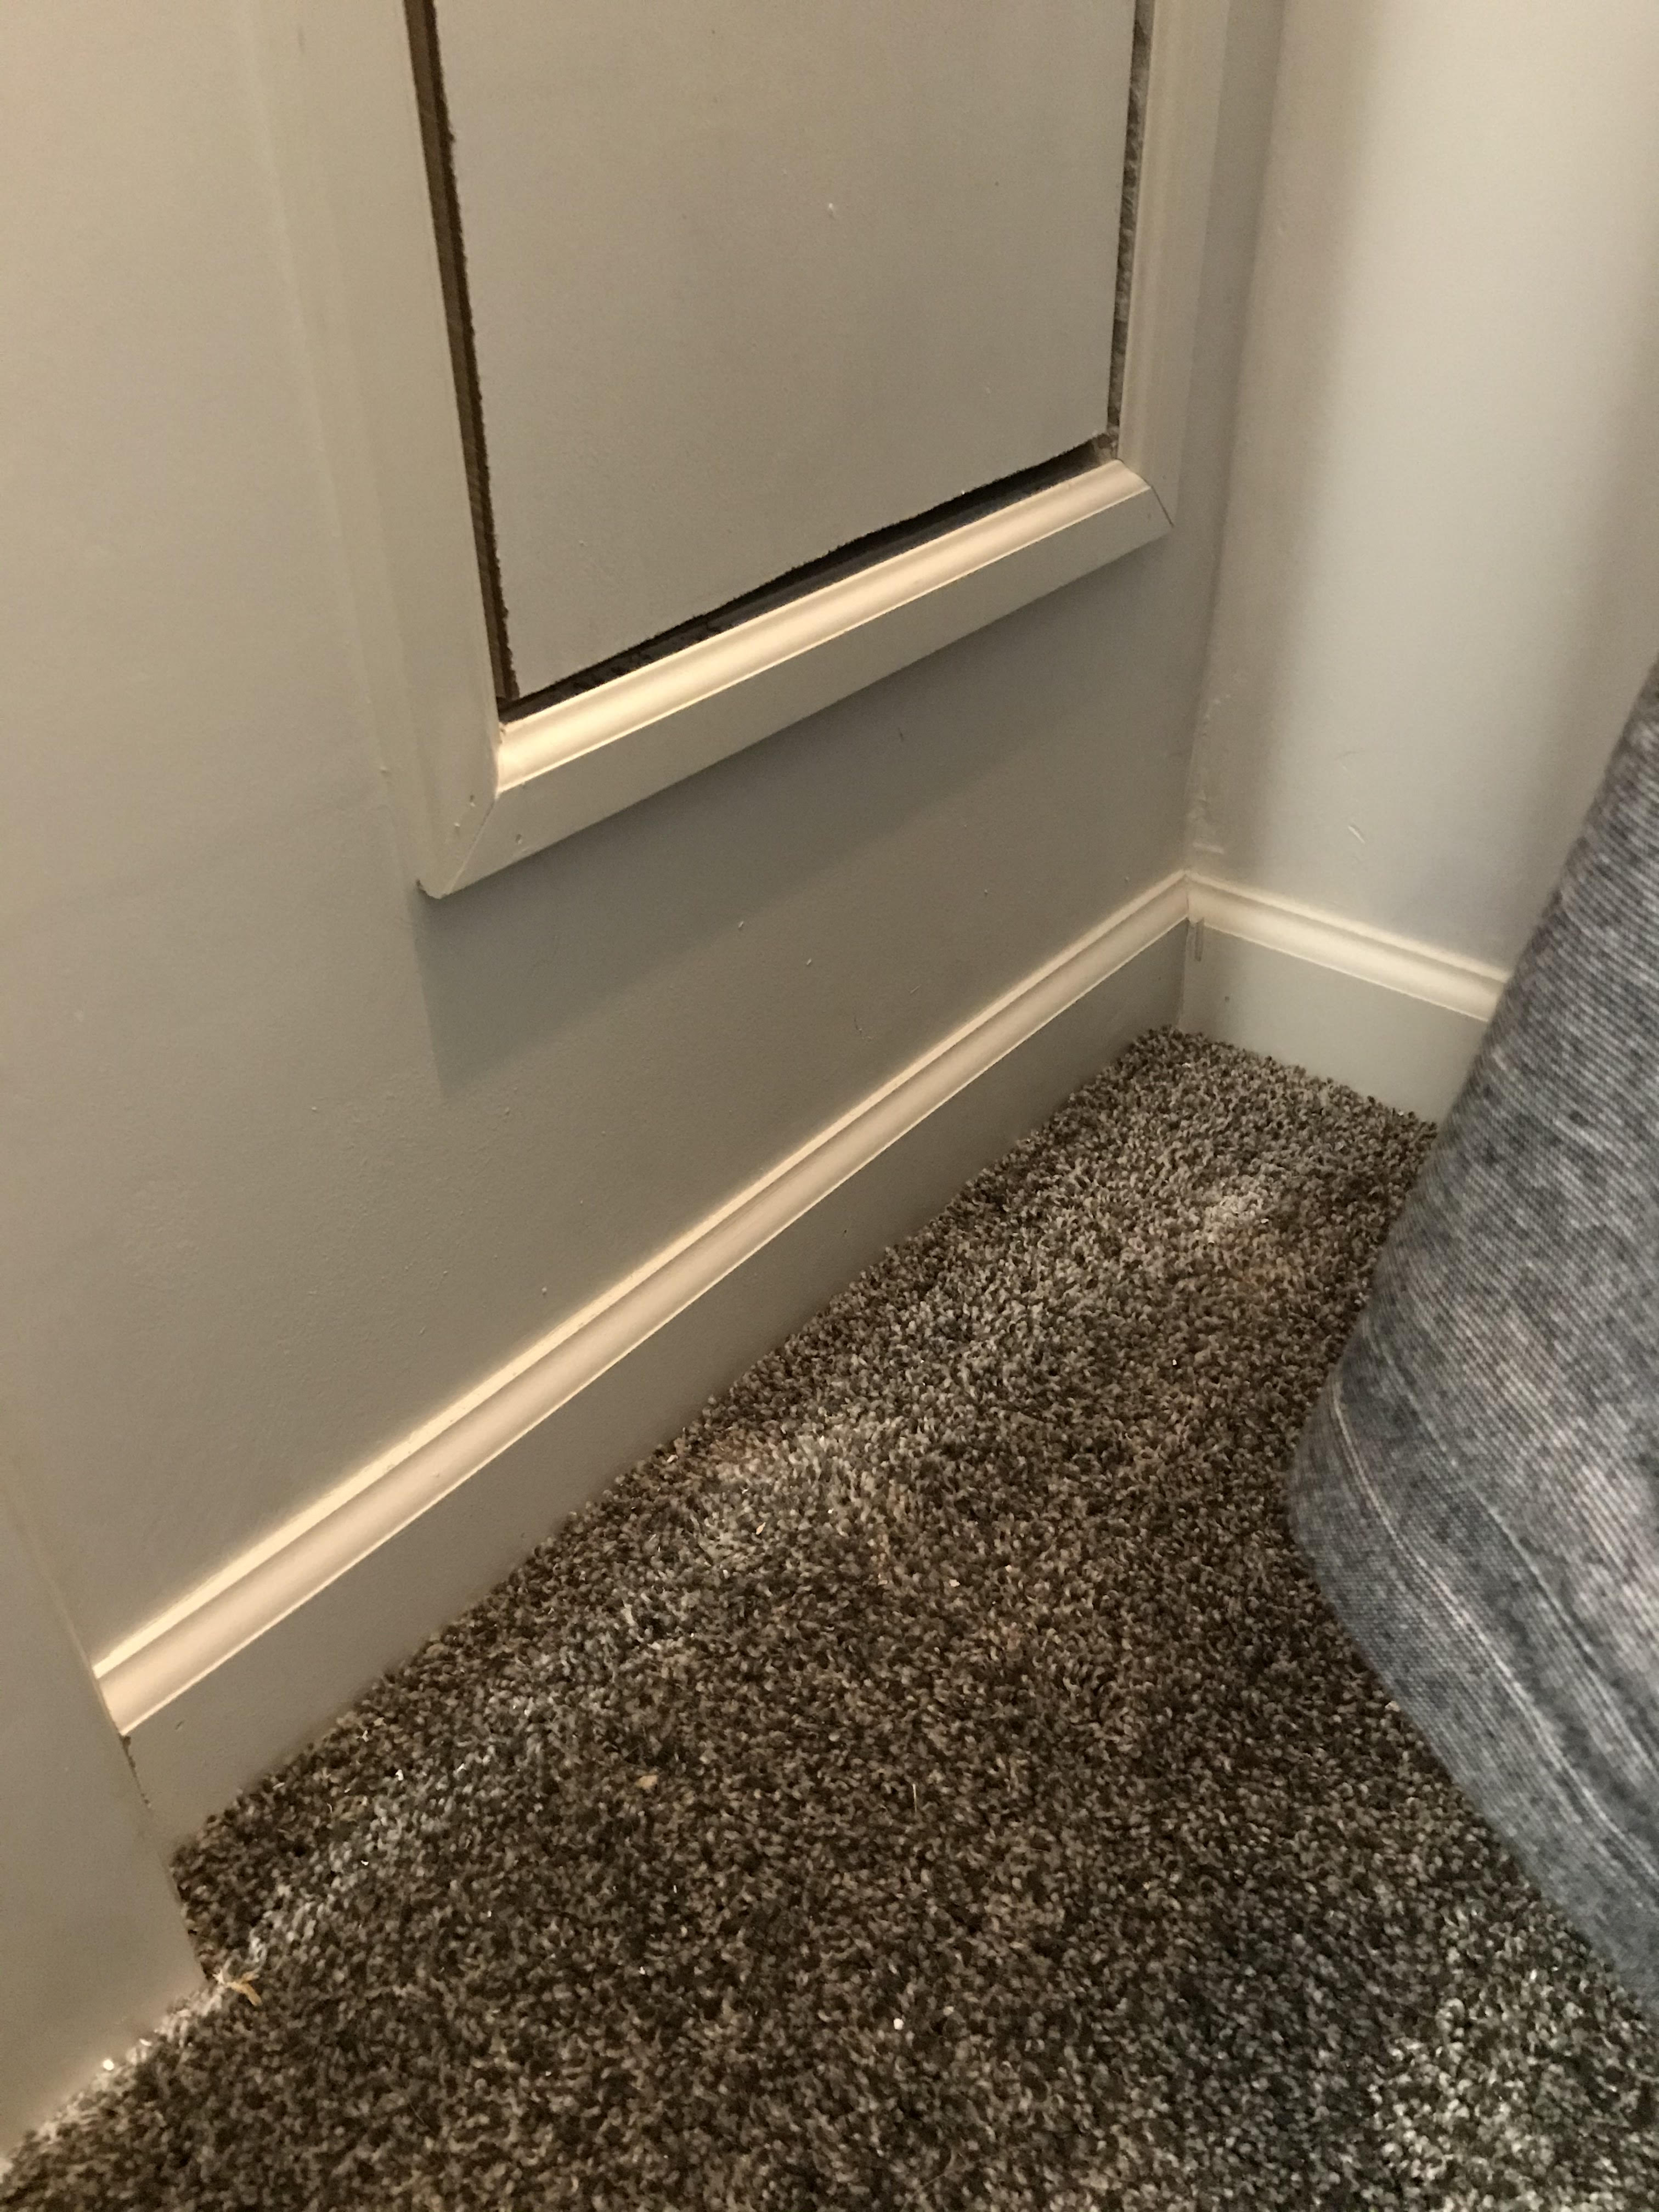
- Floor Trim - free, had some spare
- Door Trim - 32$, prefinished to increase speed
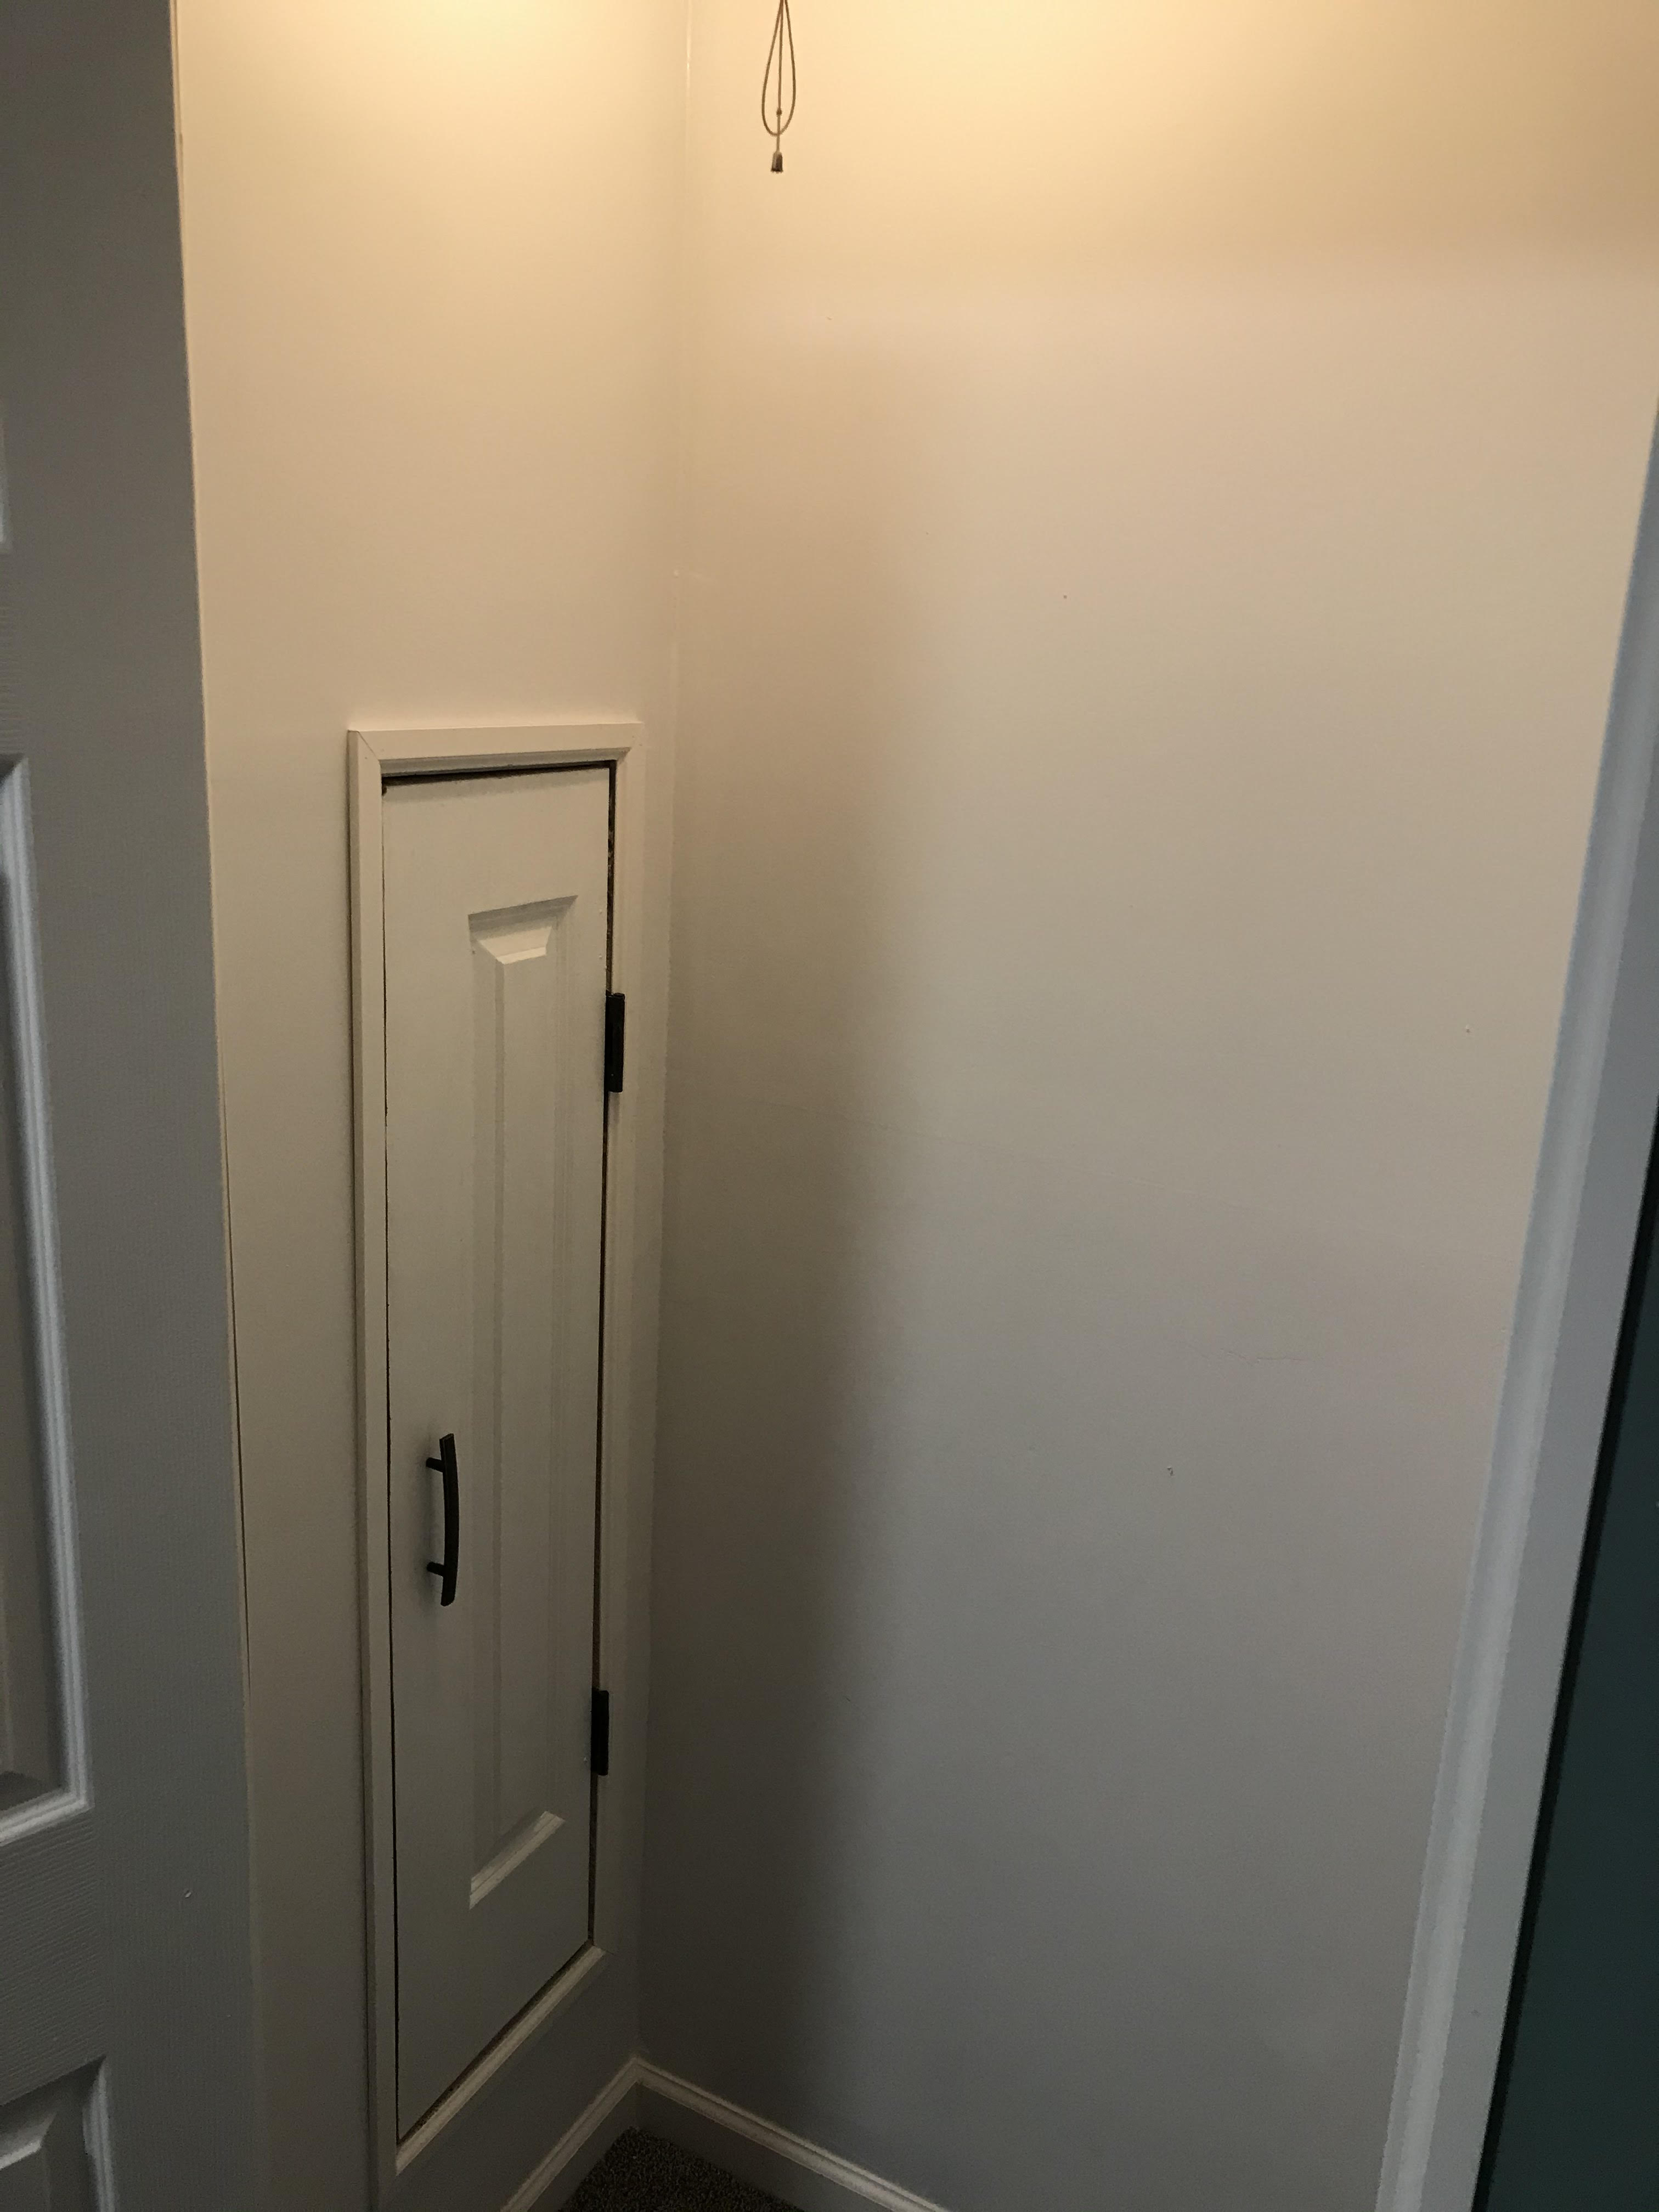
- Door - 40$, taken from a 48” byfold door. My access panel is a portion of this cut to 12 inches
- Hinges: 5$
- Handle: 4$
- Modular closet hangers - ~60$
- Odds and ends - drywall screws, some spare 2x4s
Before and After
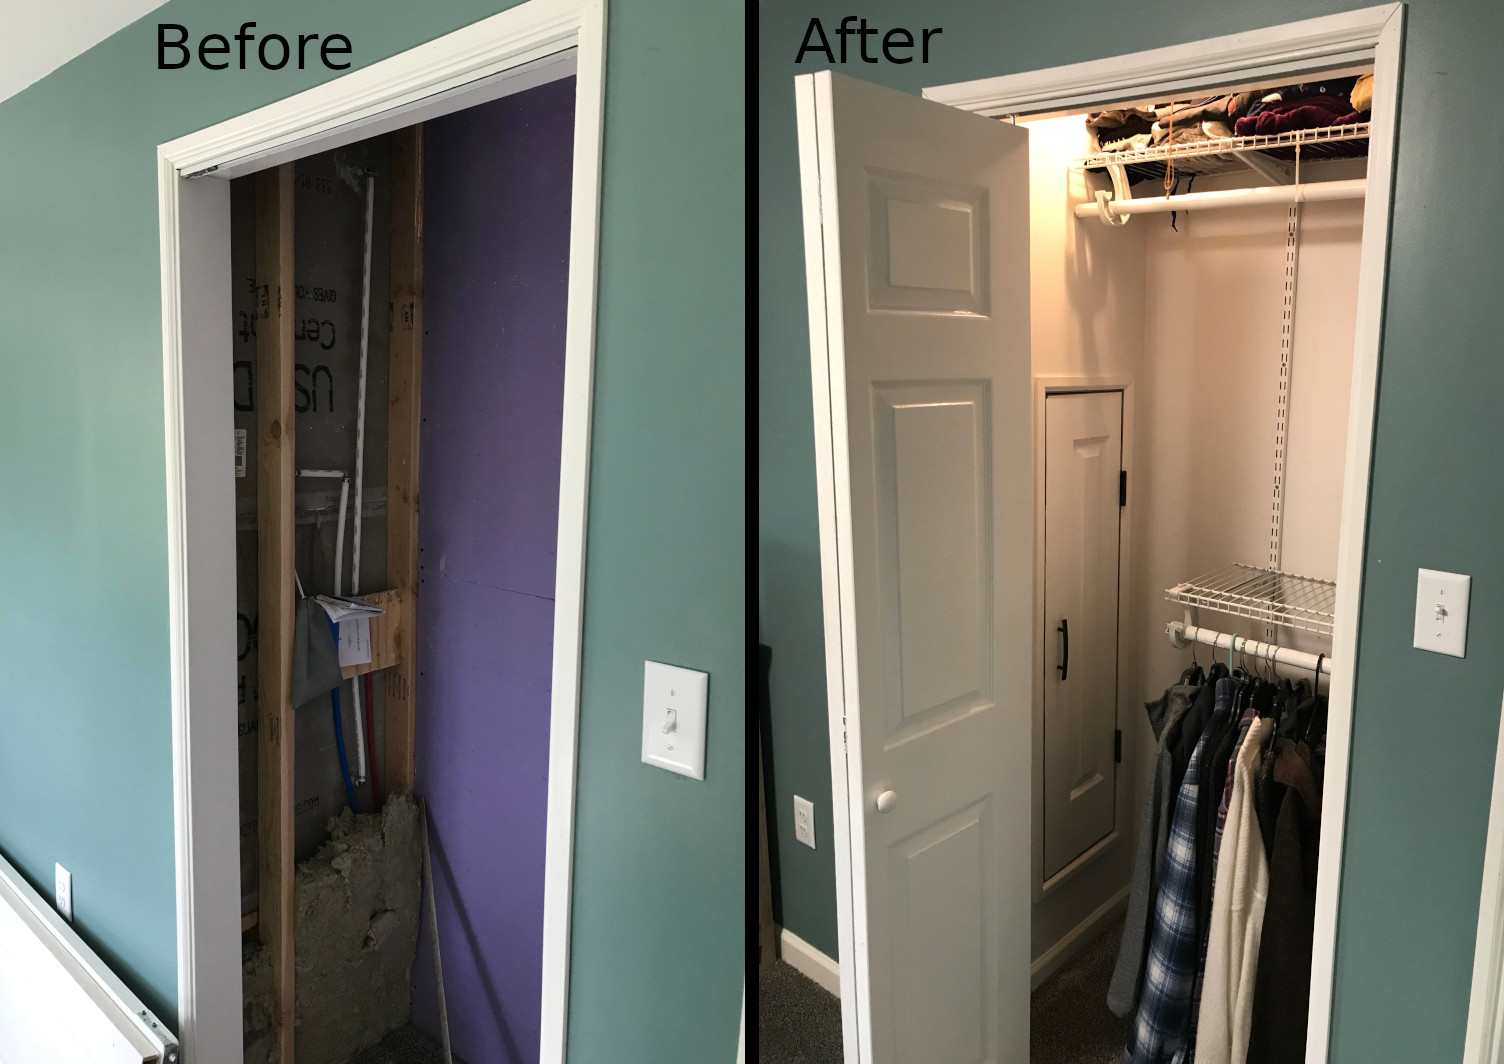
Before
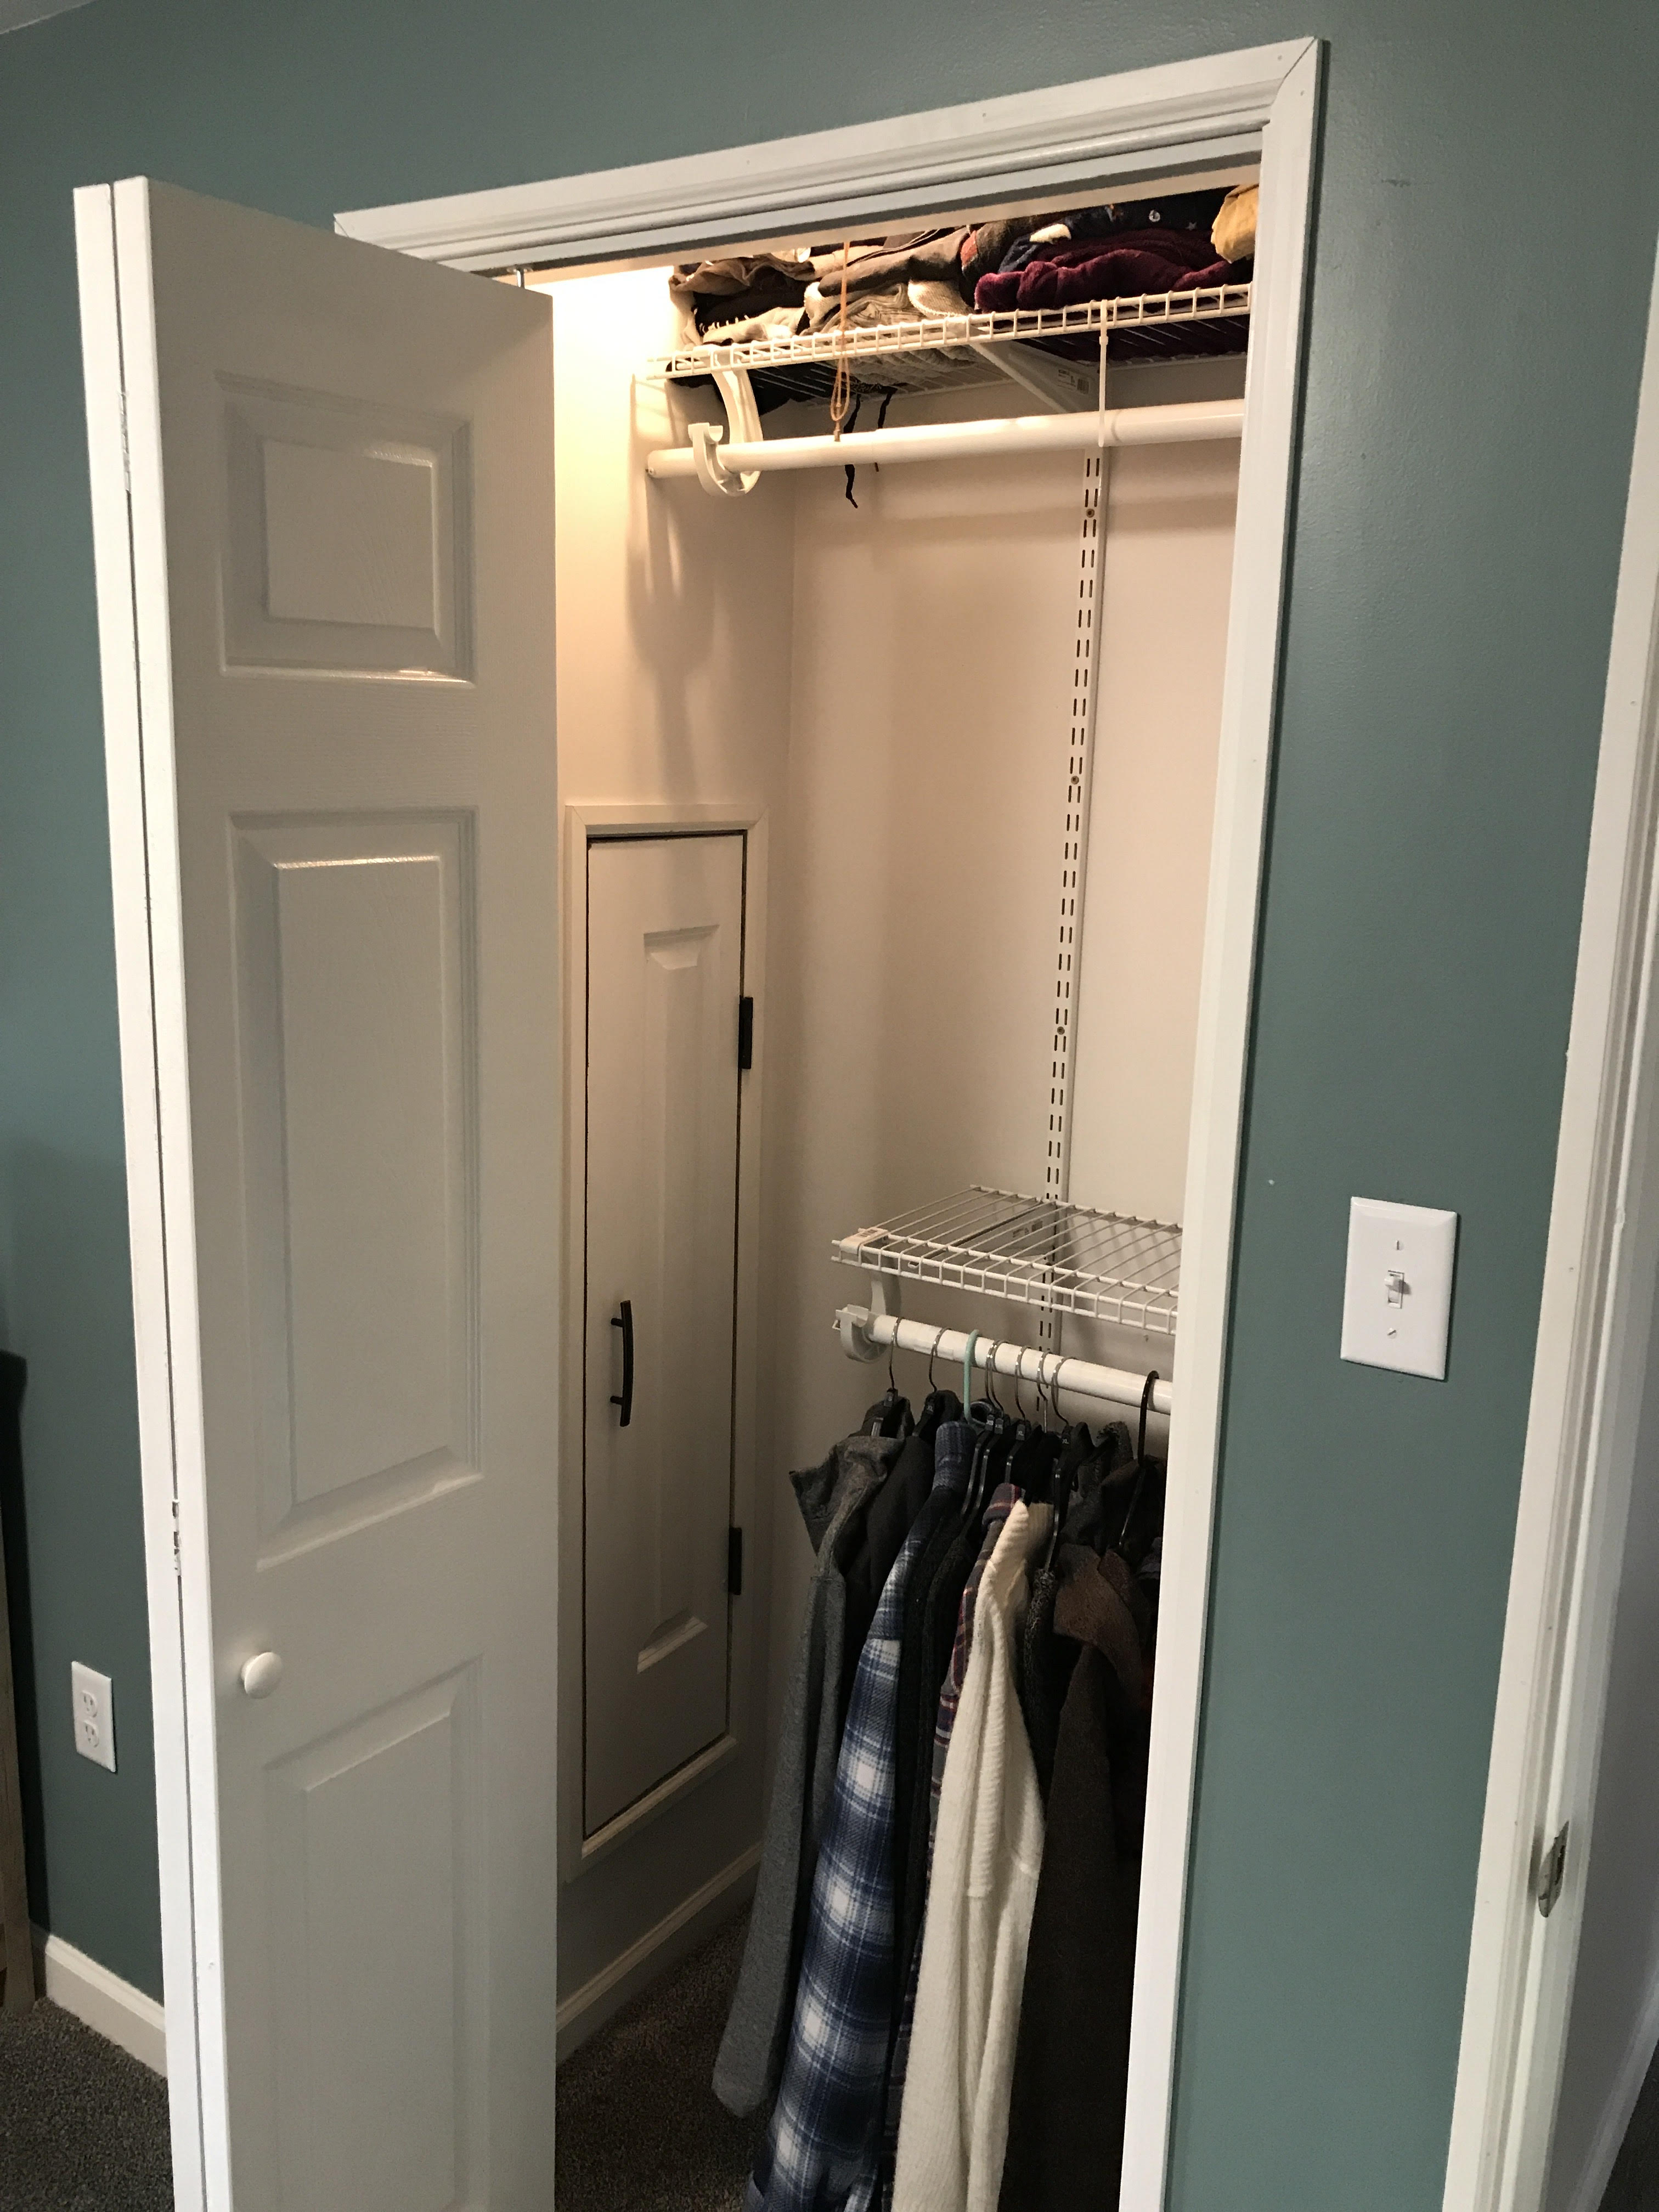
After
Why I did it
Appraisal was happening soon and I wanted to beef up value by increasing sqft and including this closet that I destroyed from a remodel.
How I did it
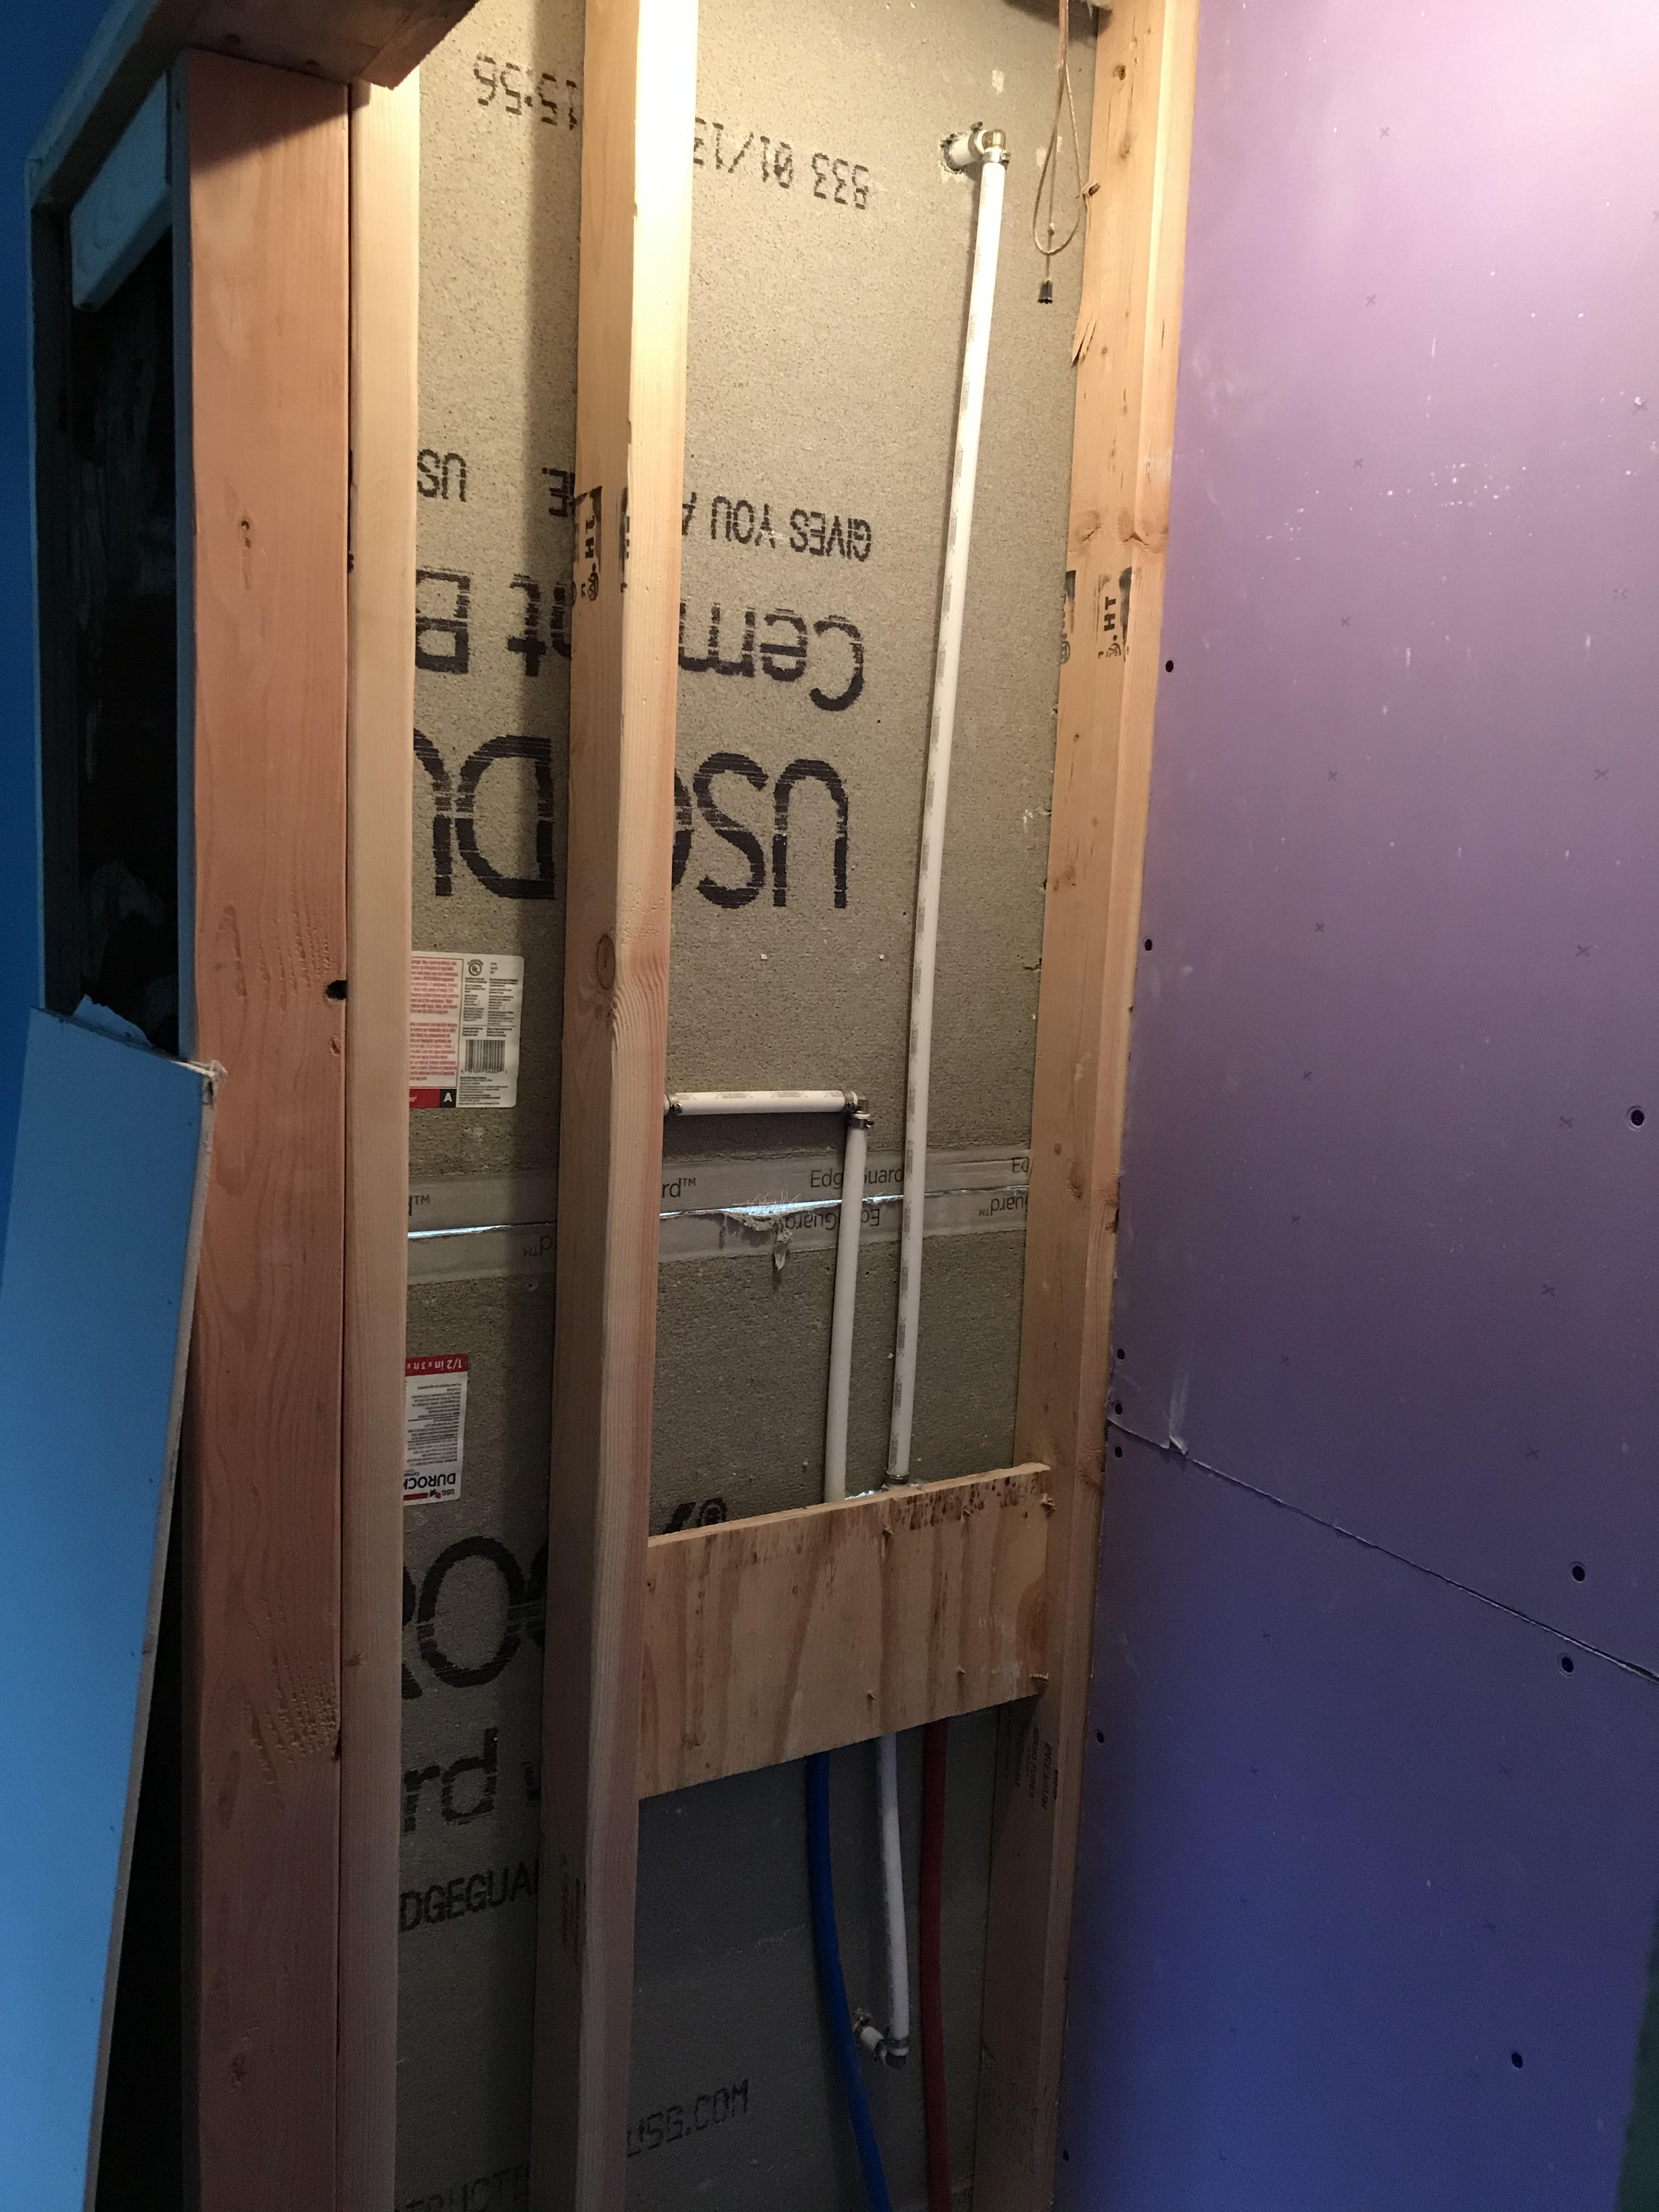
- Start by framing the access panel, i had some spare wood i could use. I had to plane the wood to fit around the shower control valve. Keep it plumb with the surrounding studs, if they aren’t plum shim them. - Drill, wood screws, level
- Paint the frame you just made to match your trim color, you do this because the wood could stand out a bit by itself and you want everything to jive. - paint and paint brush, 1 coat is fine it doesn’t need to be perfect, just so when you open up the closet you don’t see ugly unfinished wood
- While you got paint out, paint the access panel door or any trim that needs painting.
- I decided to insulate the left/right stud cavities just because I had some spare rockwool lying around. This will do nothing in terms of heating/cooling but it adds some mass for sound dampening from the tub/shower. I did this to my whole bathroom before to dampen any noise before too.
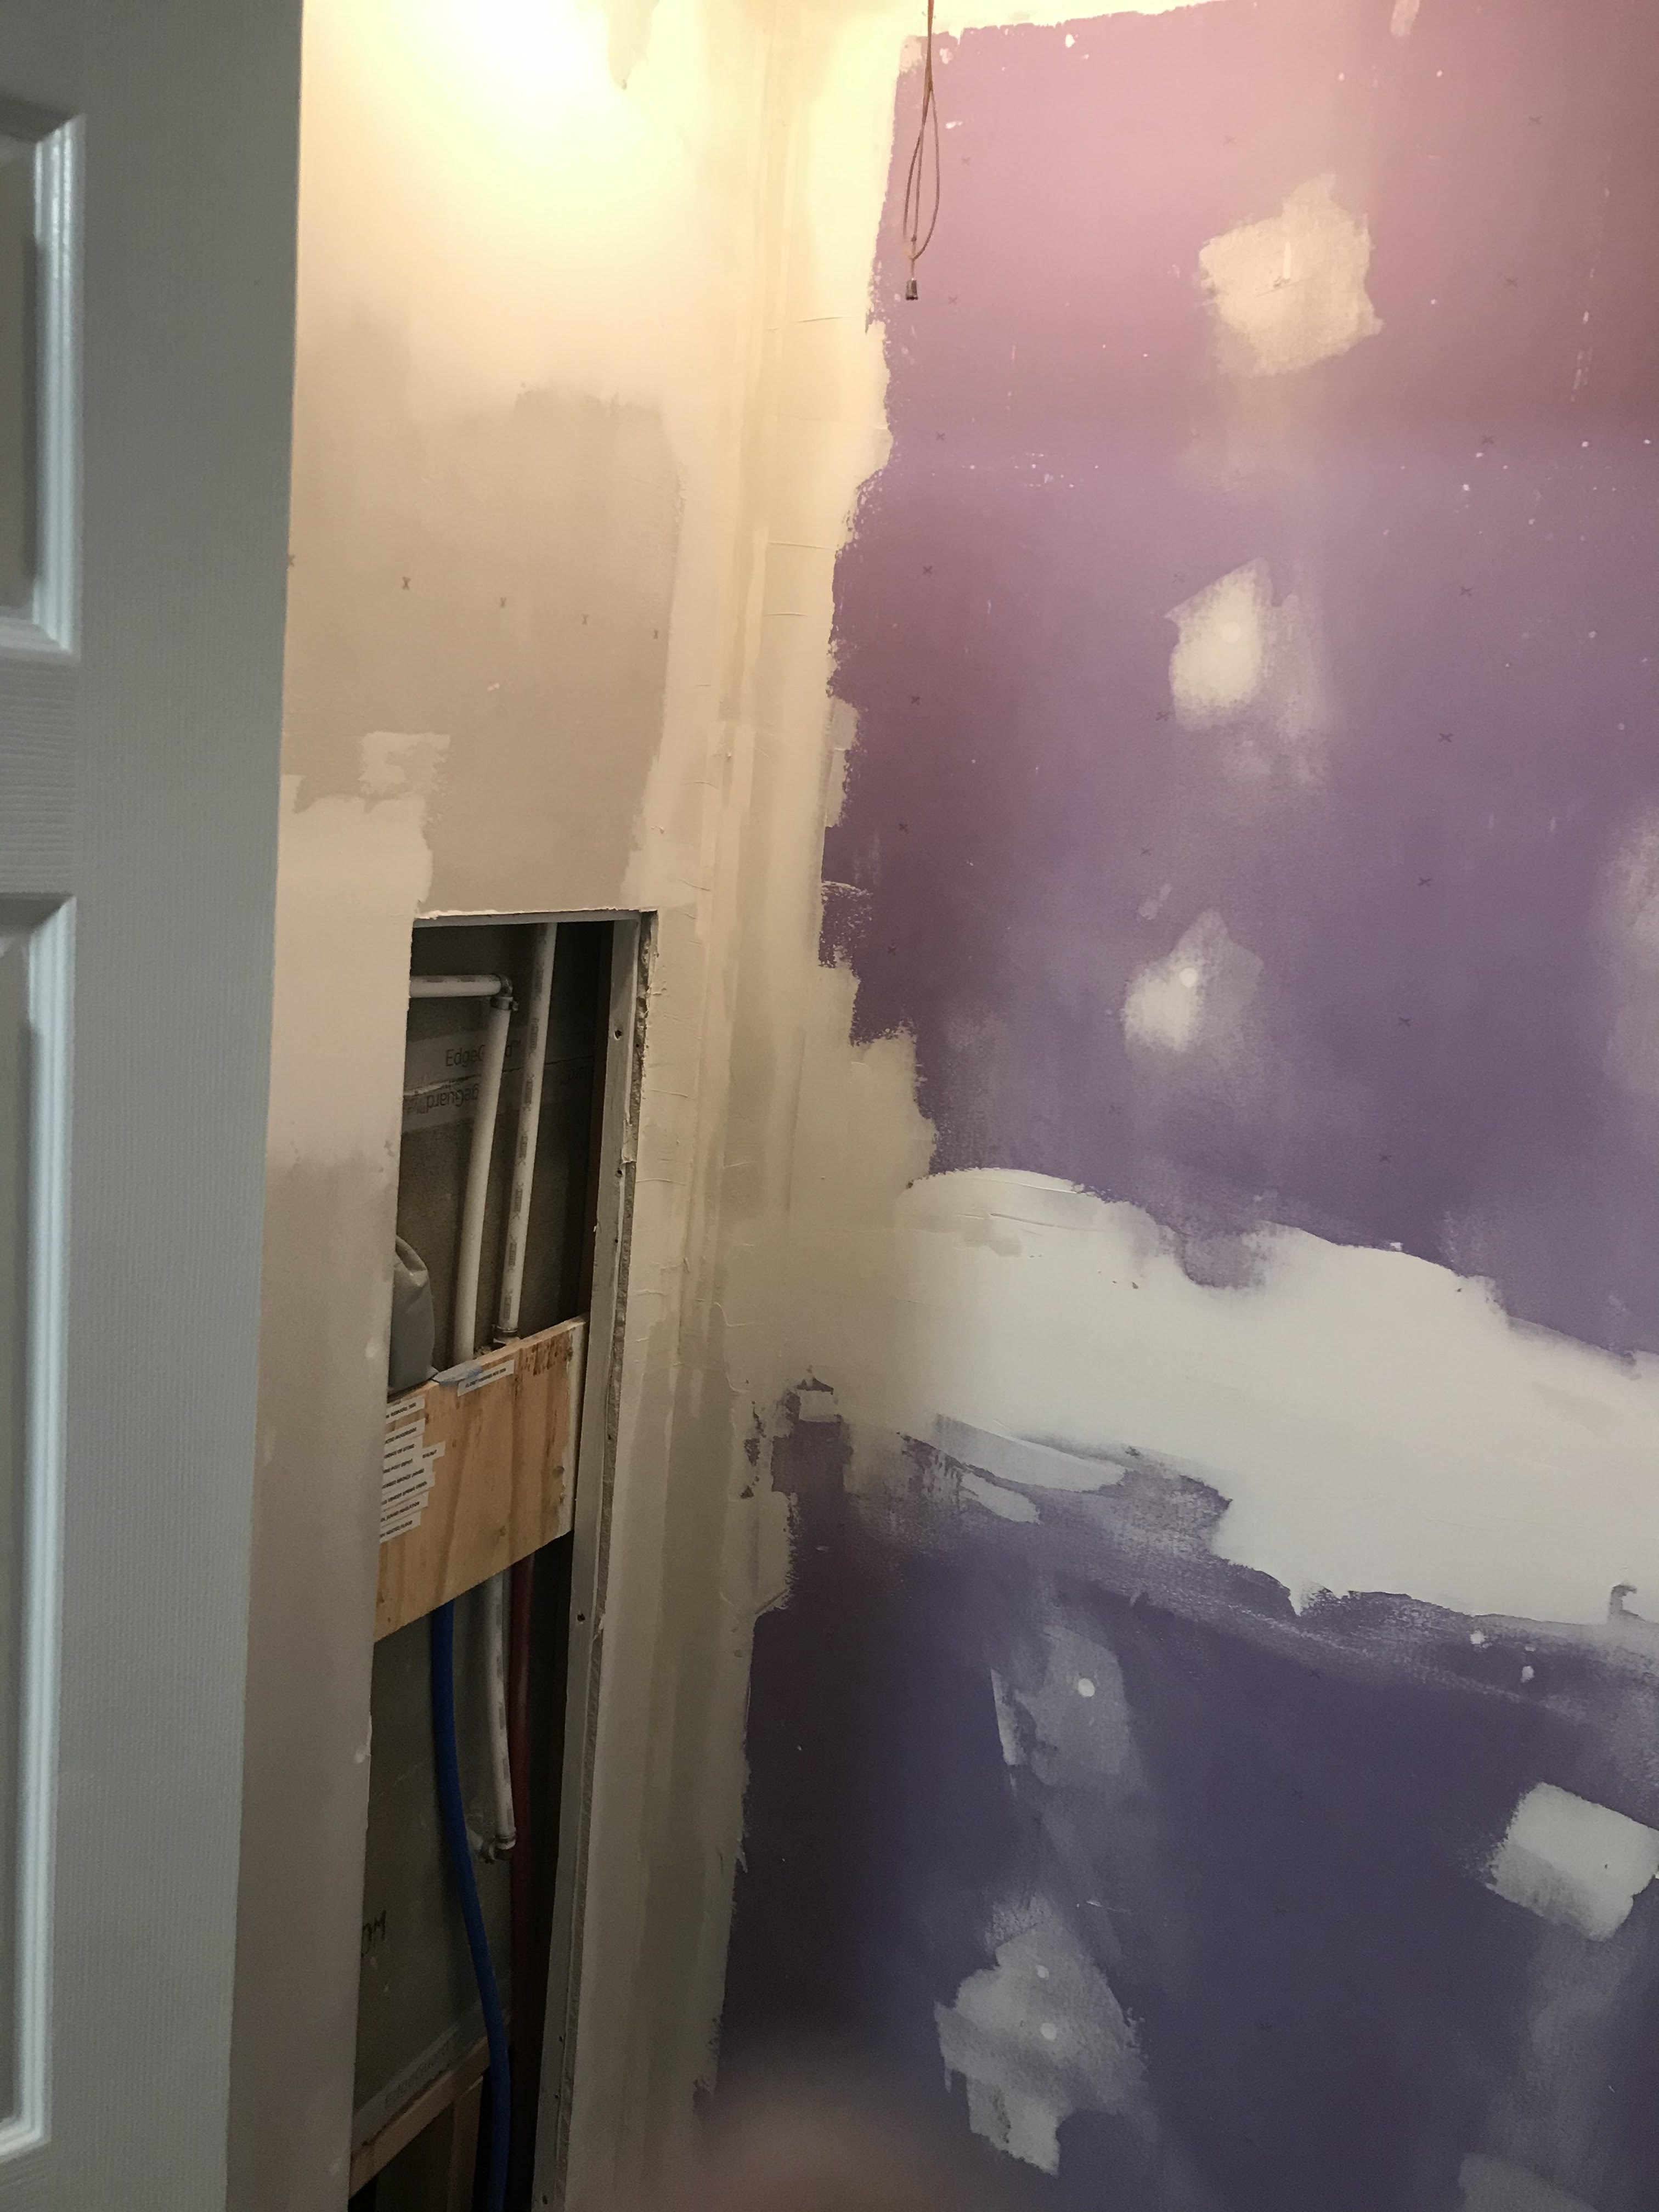
- Hang the drywall, give yourself enough room around the frame to fit hinges, around 1/4-1/2 an inch - drill, drywall screws, utility knife, P100 Mask
- Spackle, I set the heat to 80 degrees in the room to promote faster curing and ran a fan. This step usually takes several days but you can speed it up with a few tricks. Be sure to do thin layers of spackle, no thick build ups your life will suck. I always water down my spackle with about a table spoon of water until i get a smooth consistency. I want to see no bubbles of spackle as i apply it to the wall. This helps you apply thinner layers too. About the consistency of soft serve ice cream. I was able to get done spackling in 3 coats over 15 hours. - spackle, putty knives, fan, drywall tape, drywall fiber tape.
- Paint the walls - use Killz or some other thicc paint or you’ll have to do like 10 coats. Spackle and raw drywall will soak it up like a sponge. I had to do 2 coats with a thick primer, i didn’t bother painting a color overtop. Its just a closet.
- Trim the door and access panel door - I recommend nice thin trim, but that’s just my style. - mitre saw, measuring tape, nail gun or hammer/finishing nails
- Trim the floor - same as above
- Caulk the trim - Some DAP white caulk, caulk gun, paper towels
Pro tip for cutting trim with mitre saw: Go big, like 1/4->1/2 an inch bigger than expected until you get the hang of it, cut back if its too big. It’s easy to mess up cutting trim like this, so cut larger than expected. Save yourself a trip to the depot.
Pro tip for mudding: don’t fall for the cute metal inside corners they sell at the store, they make your job harder. Use drywall tape, fold it in half in about 2ft segments. Put a light coat of spackle in the corner, then put the tape up, squishing from the center out so you have no bubbles. If your hands are clean during this you’re doing something very wrong. Make sure 100% coverage exists underneath that tape, or throw it out.
Spicy Construction Photos
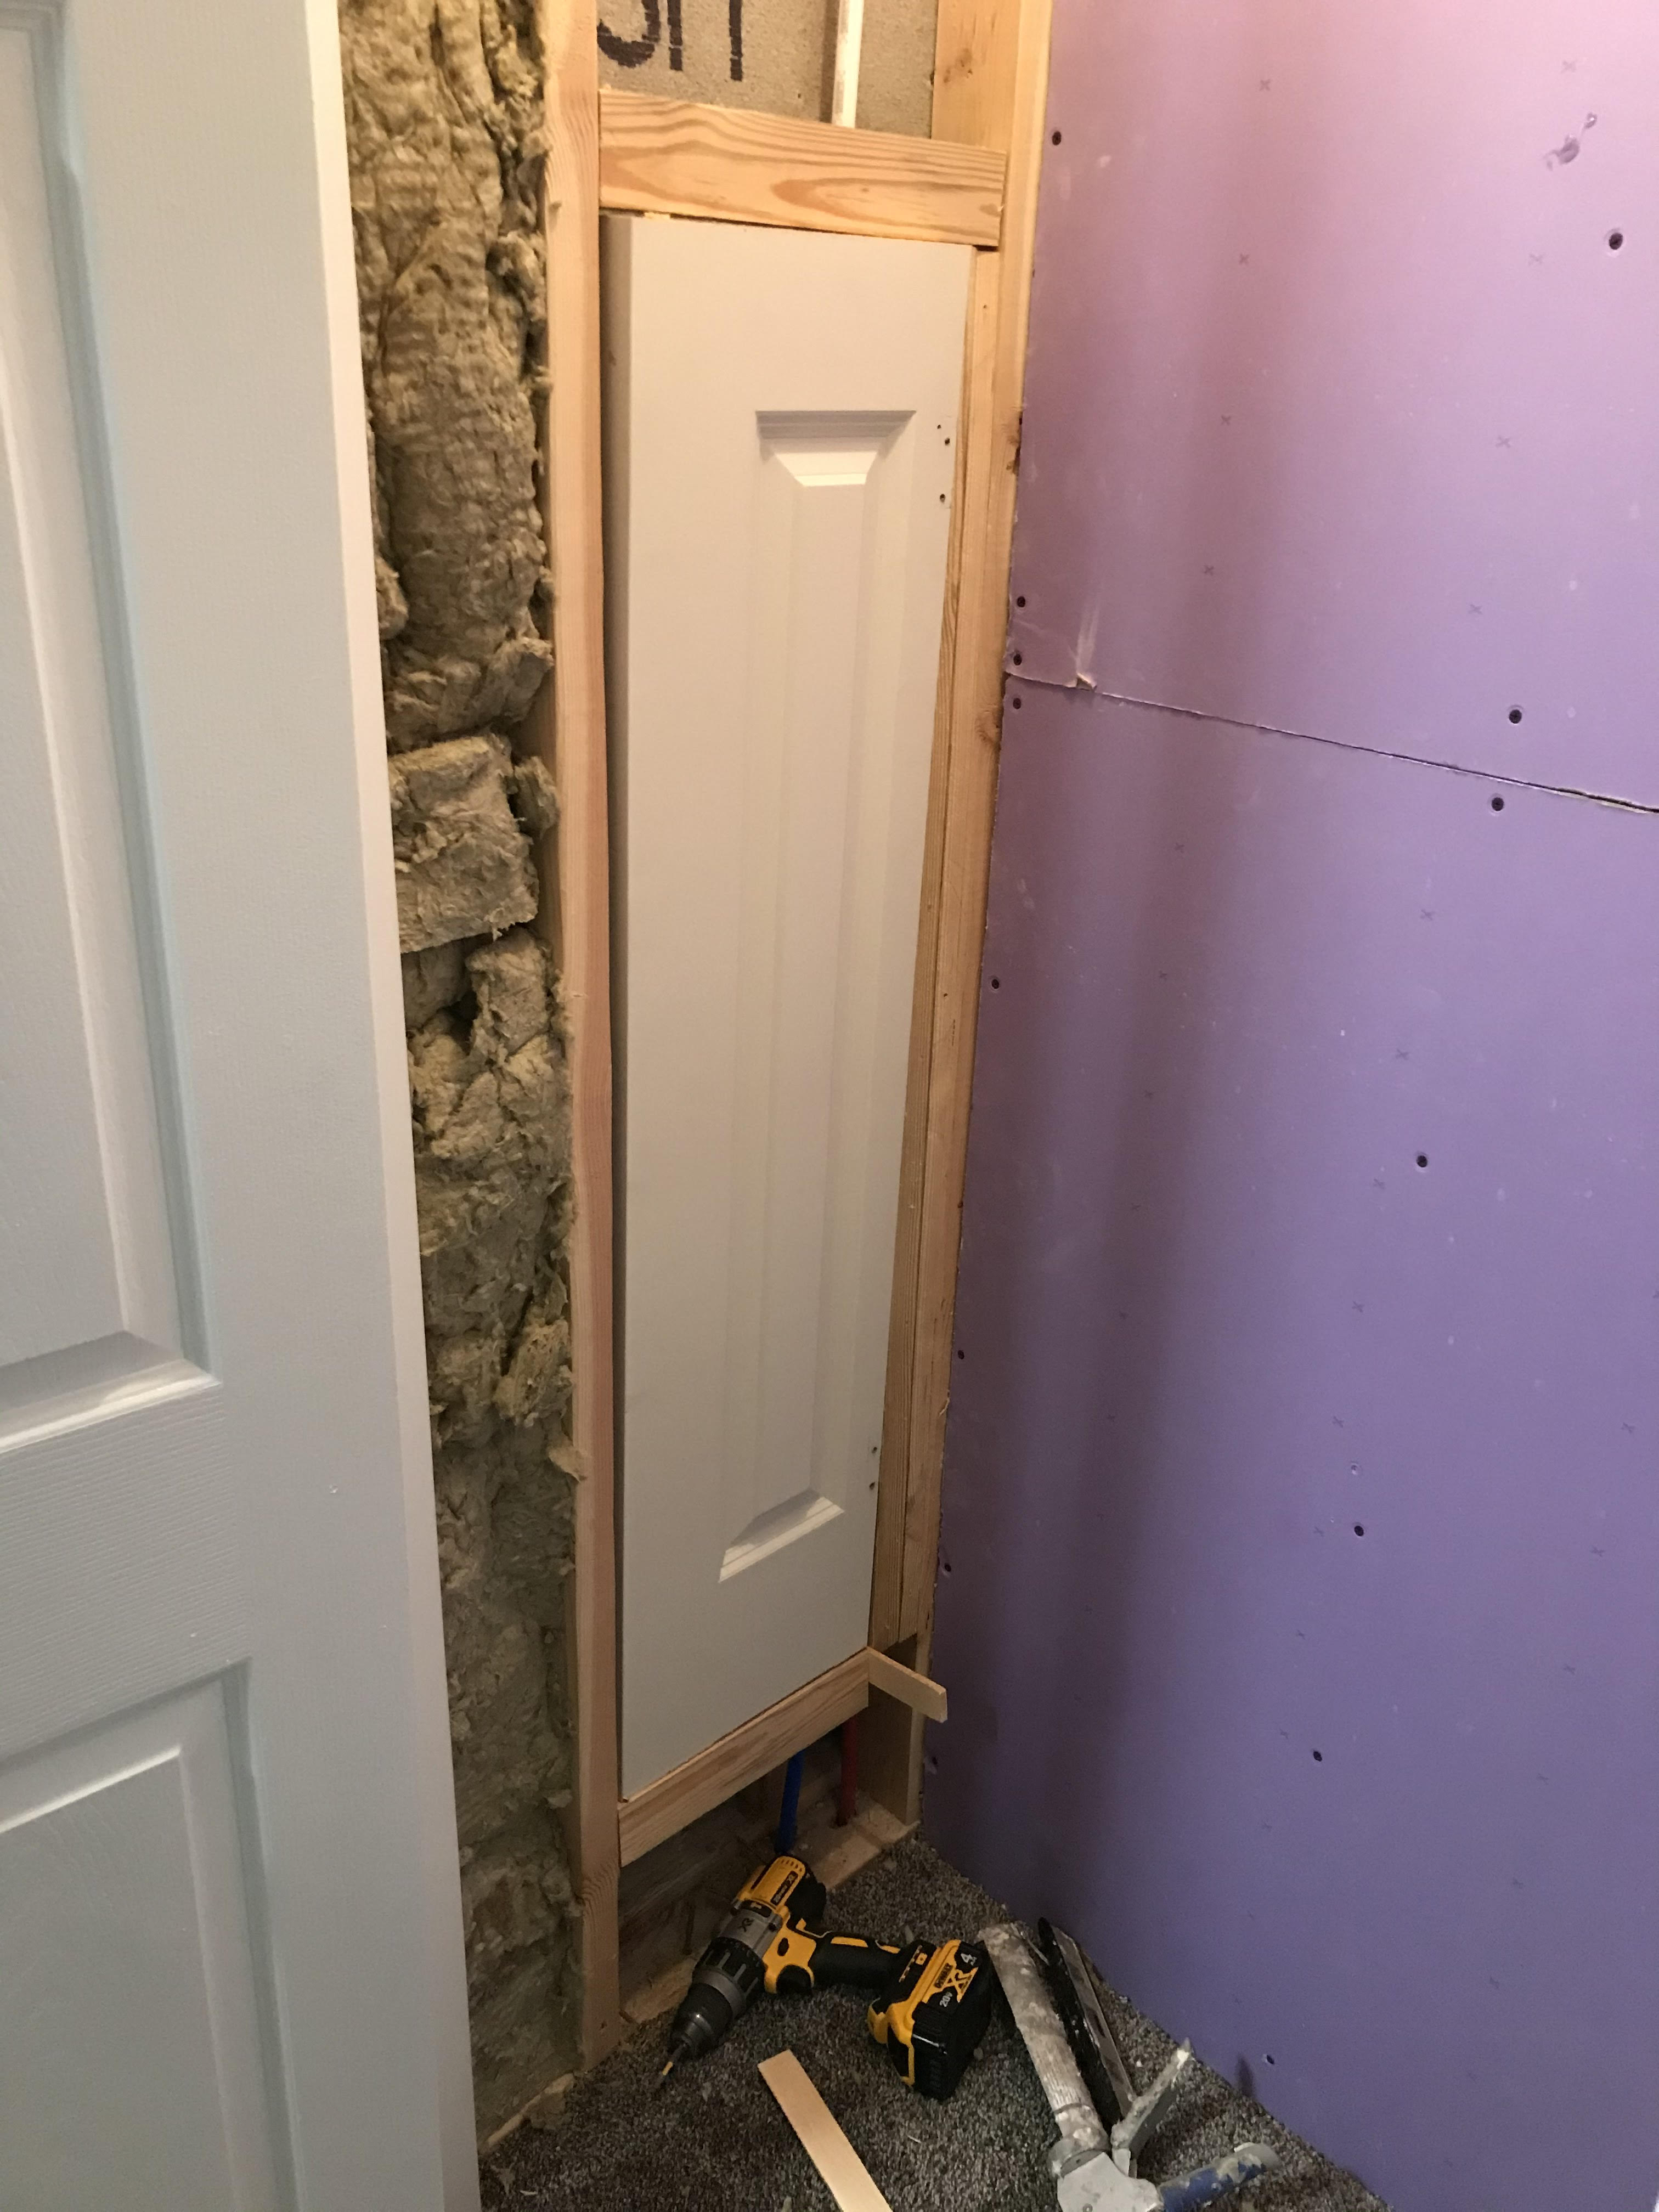
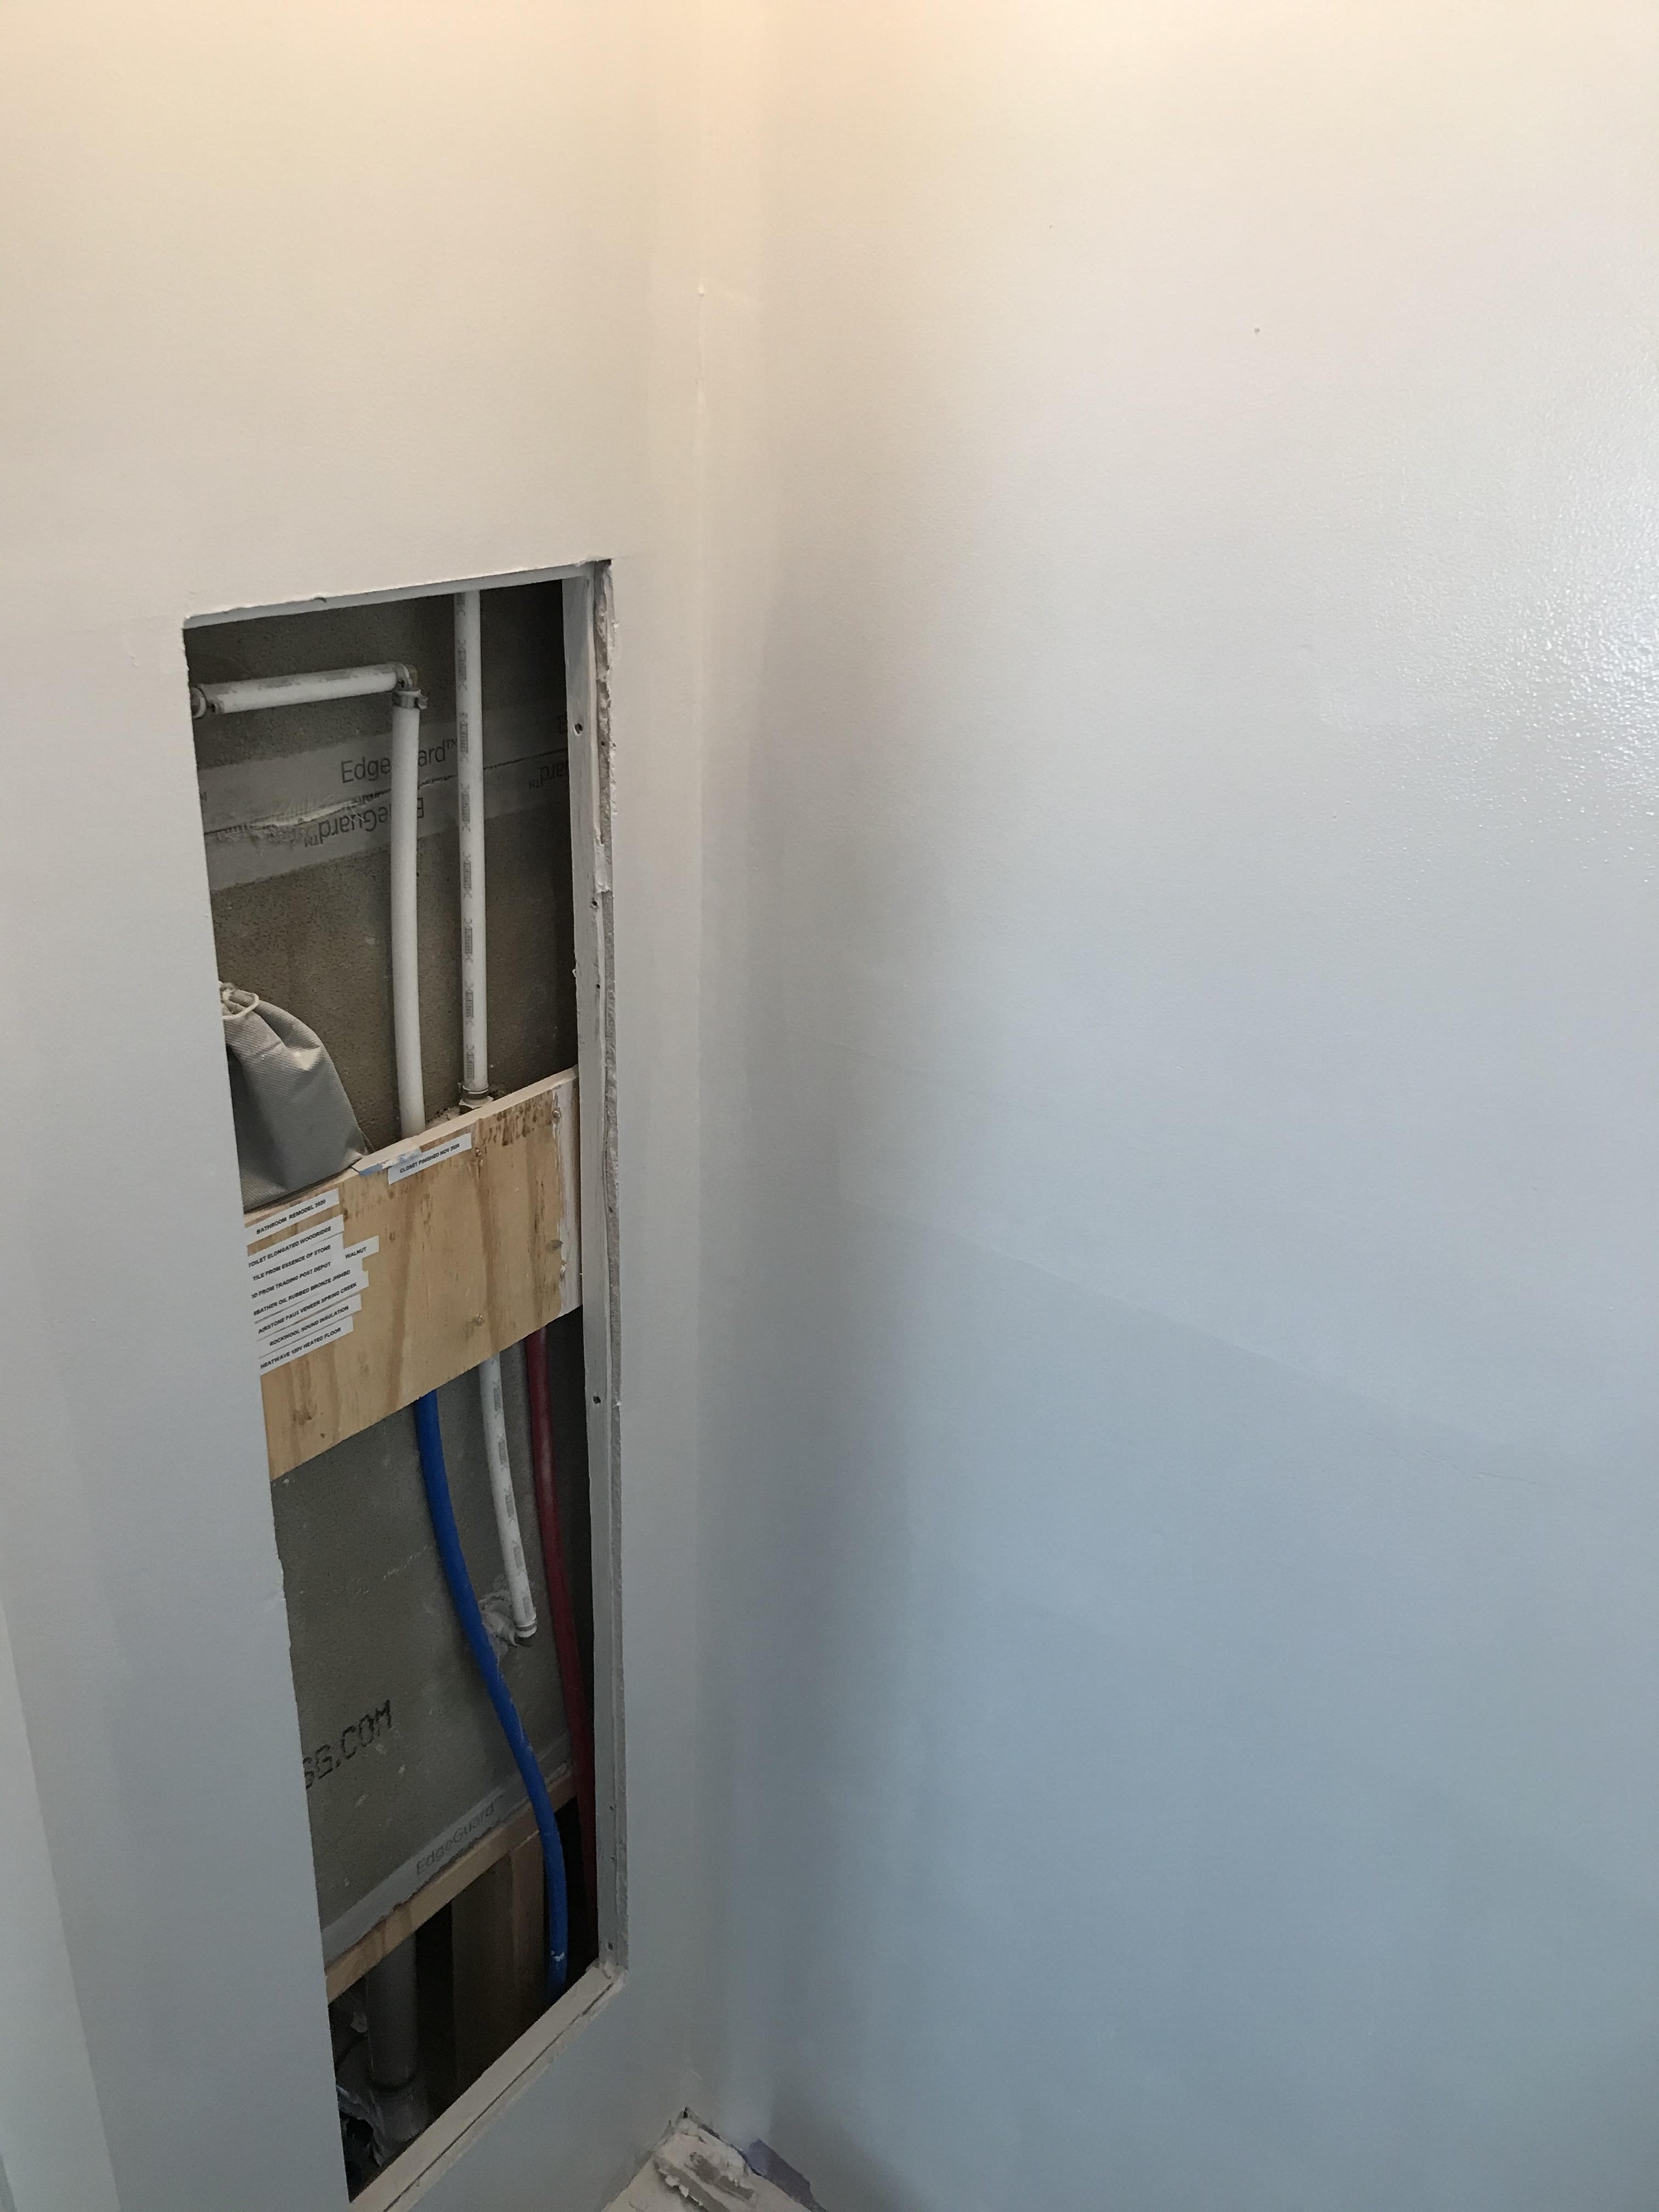
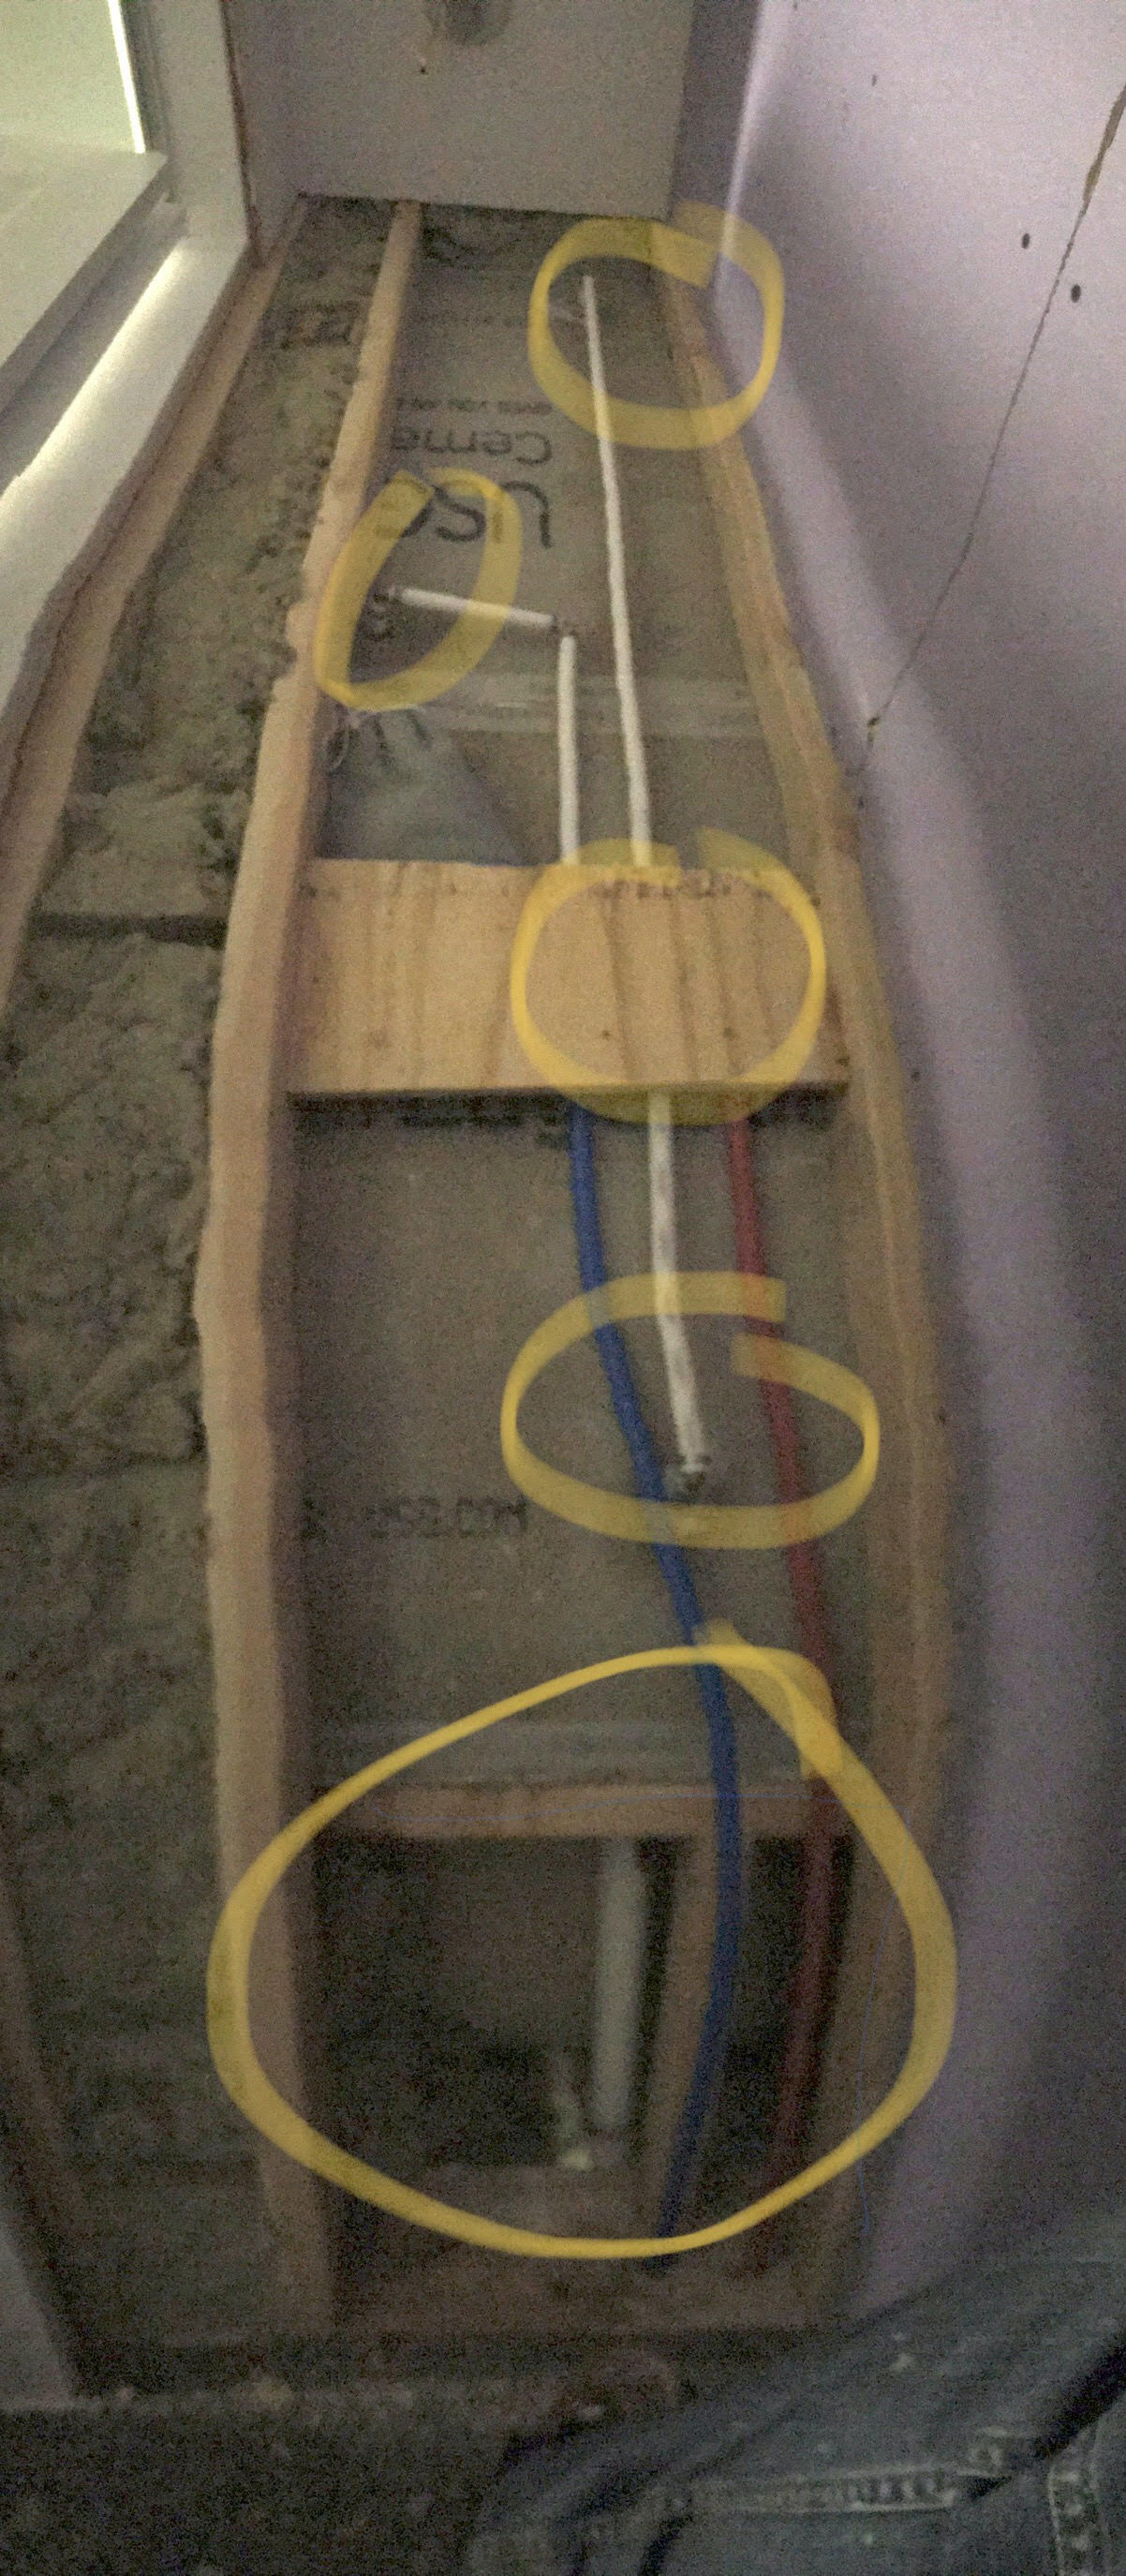
I also took the time to document inside that access panel every model number used, you can see it in the third photo.
Comments