DIY Generator Inlet
A pretty easy DIY electrical install through an unfinished area.
Total Price: ~435$
- 6 gauge copper wire (150ft) - 250$ - my inlet location is roughly 100ft from my panel, just got some extra
- Inlet - 40$
- Conduit (150ft) - 75$
- Conduit fittings - 10$
- Interlock kit - 70$
Money saved from professional install - ~1-2k. There are 3 ways to make a generator “to code”. The first is an interlock (piece of metal that keeps you from turning on the generator without disabling the main breaker), the second is a transfer switch (basically a sub panel of ~10 circuits that you can transfer power to the generator at will), and the third is the “whole house” transfer switch (similar to interlock, except this switch comes before the main breaker so you don’t need to flip that off). The latter 2 are $400+ just for parts. Some running up to 1.5k for an “automatic” transfer switch. Most electricians will talk you into (2) because it takes a good bit of time to install and is the most standard. You get charged per hour for an electrician to do this.
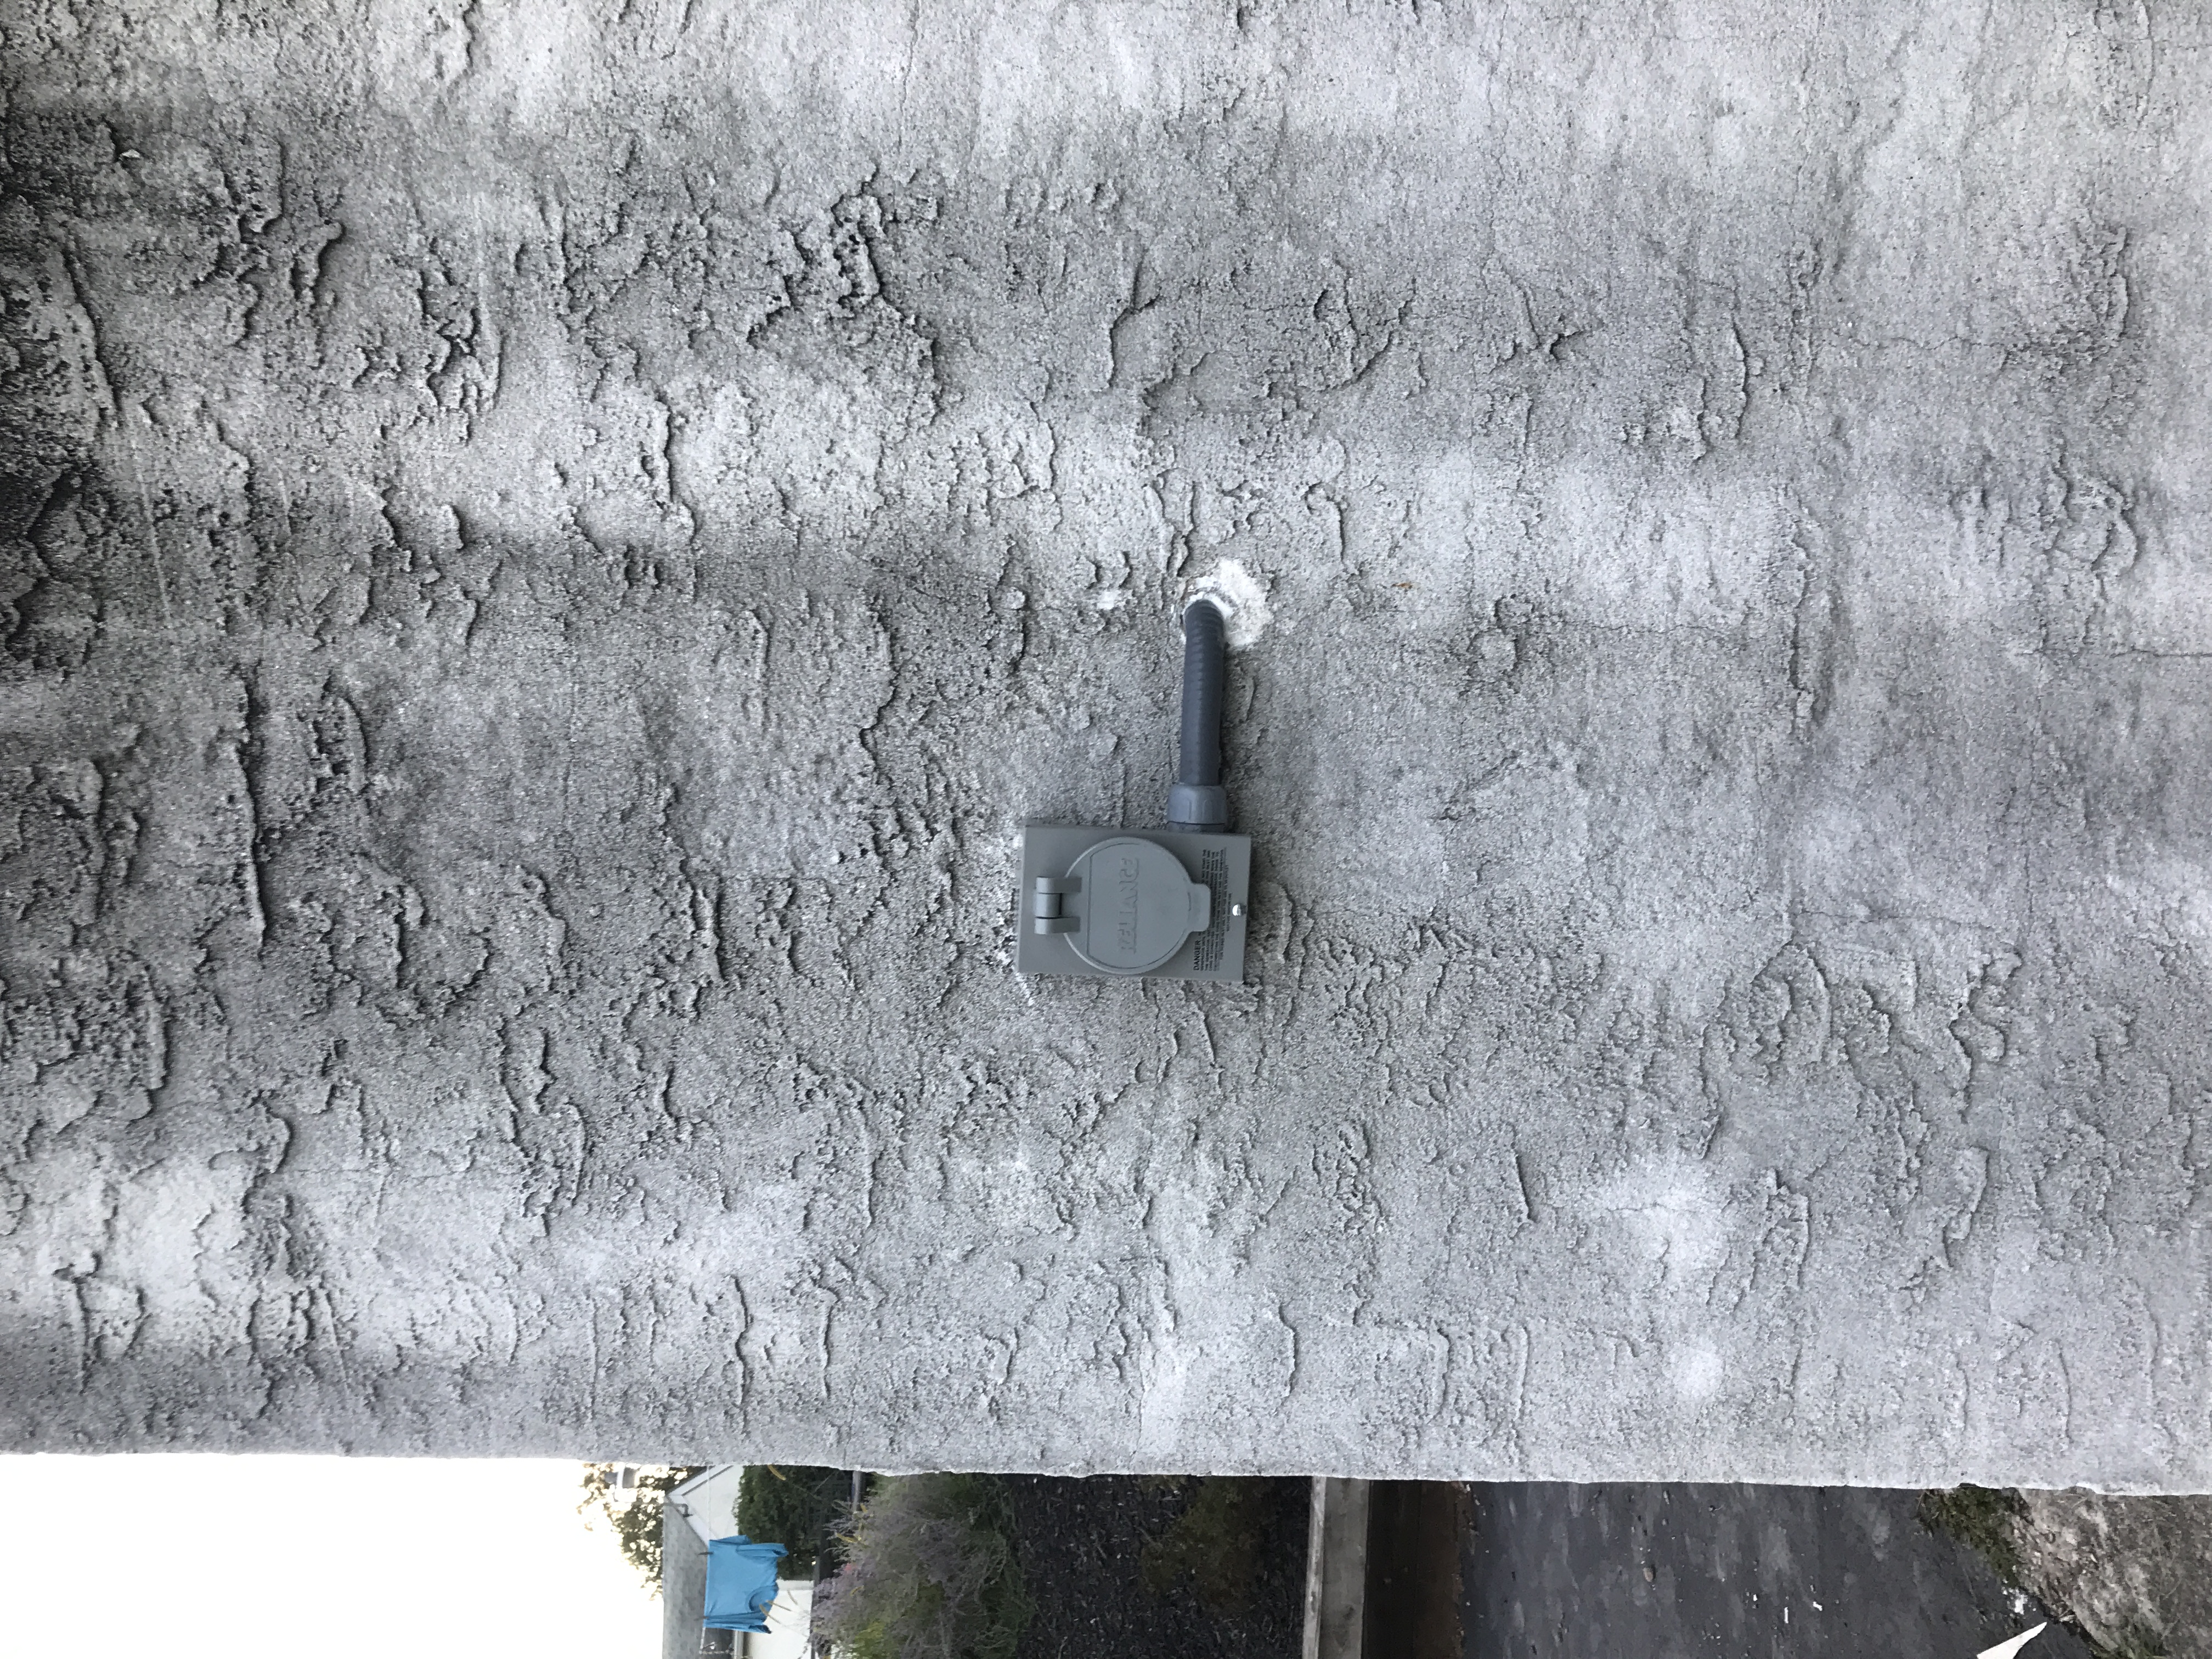
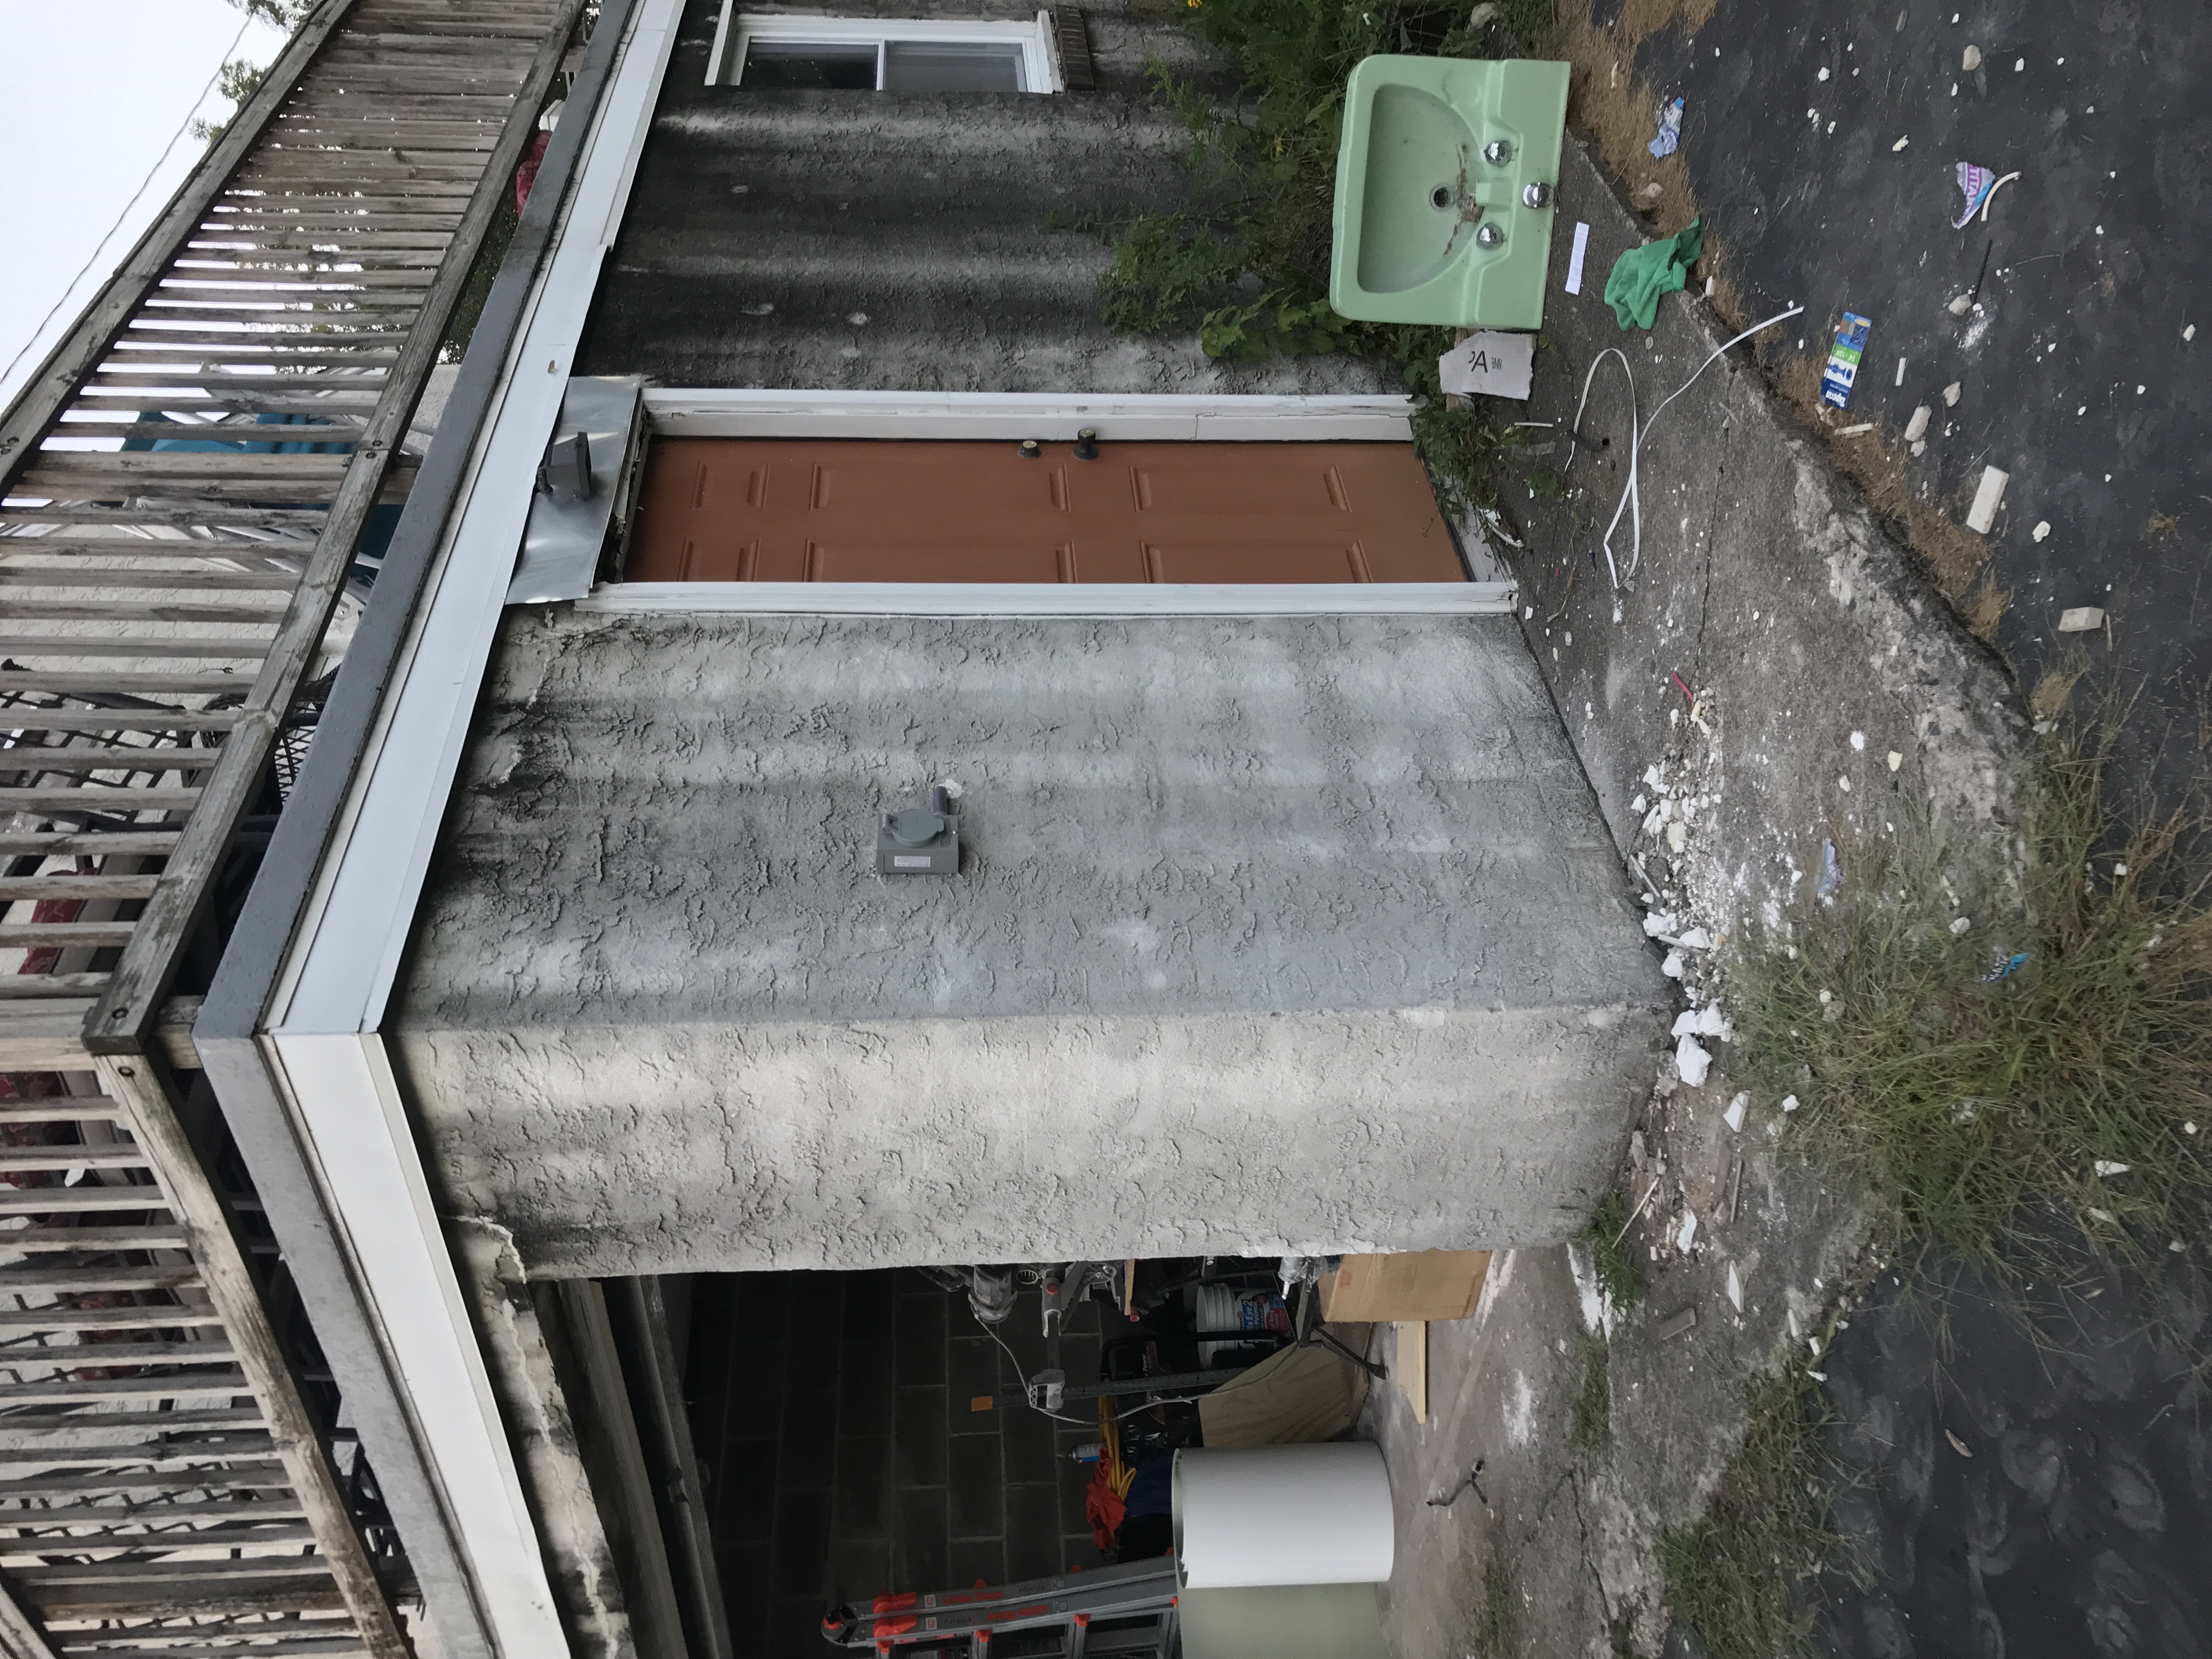
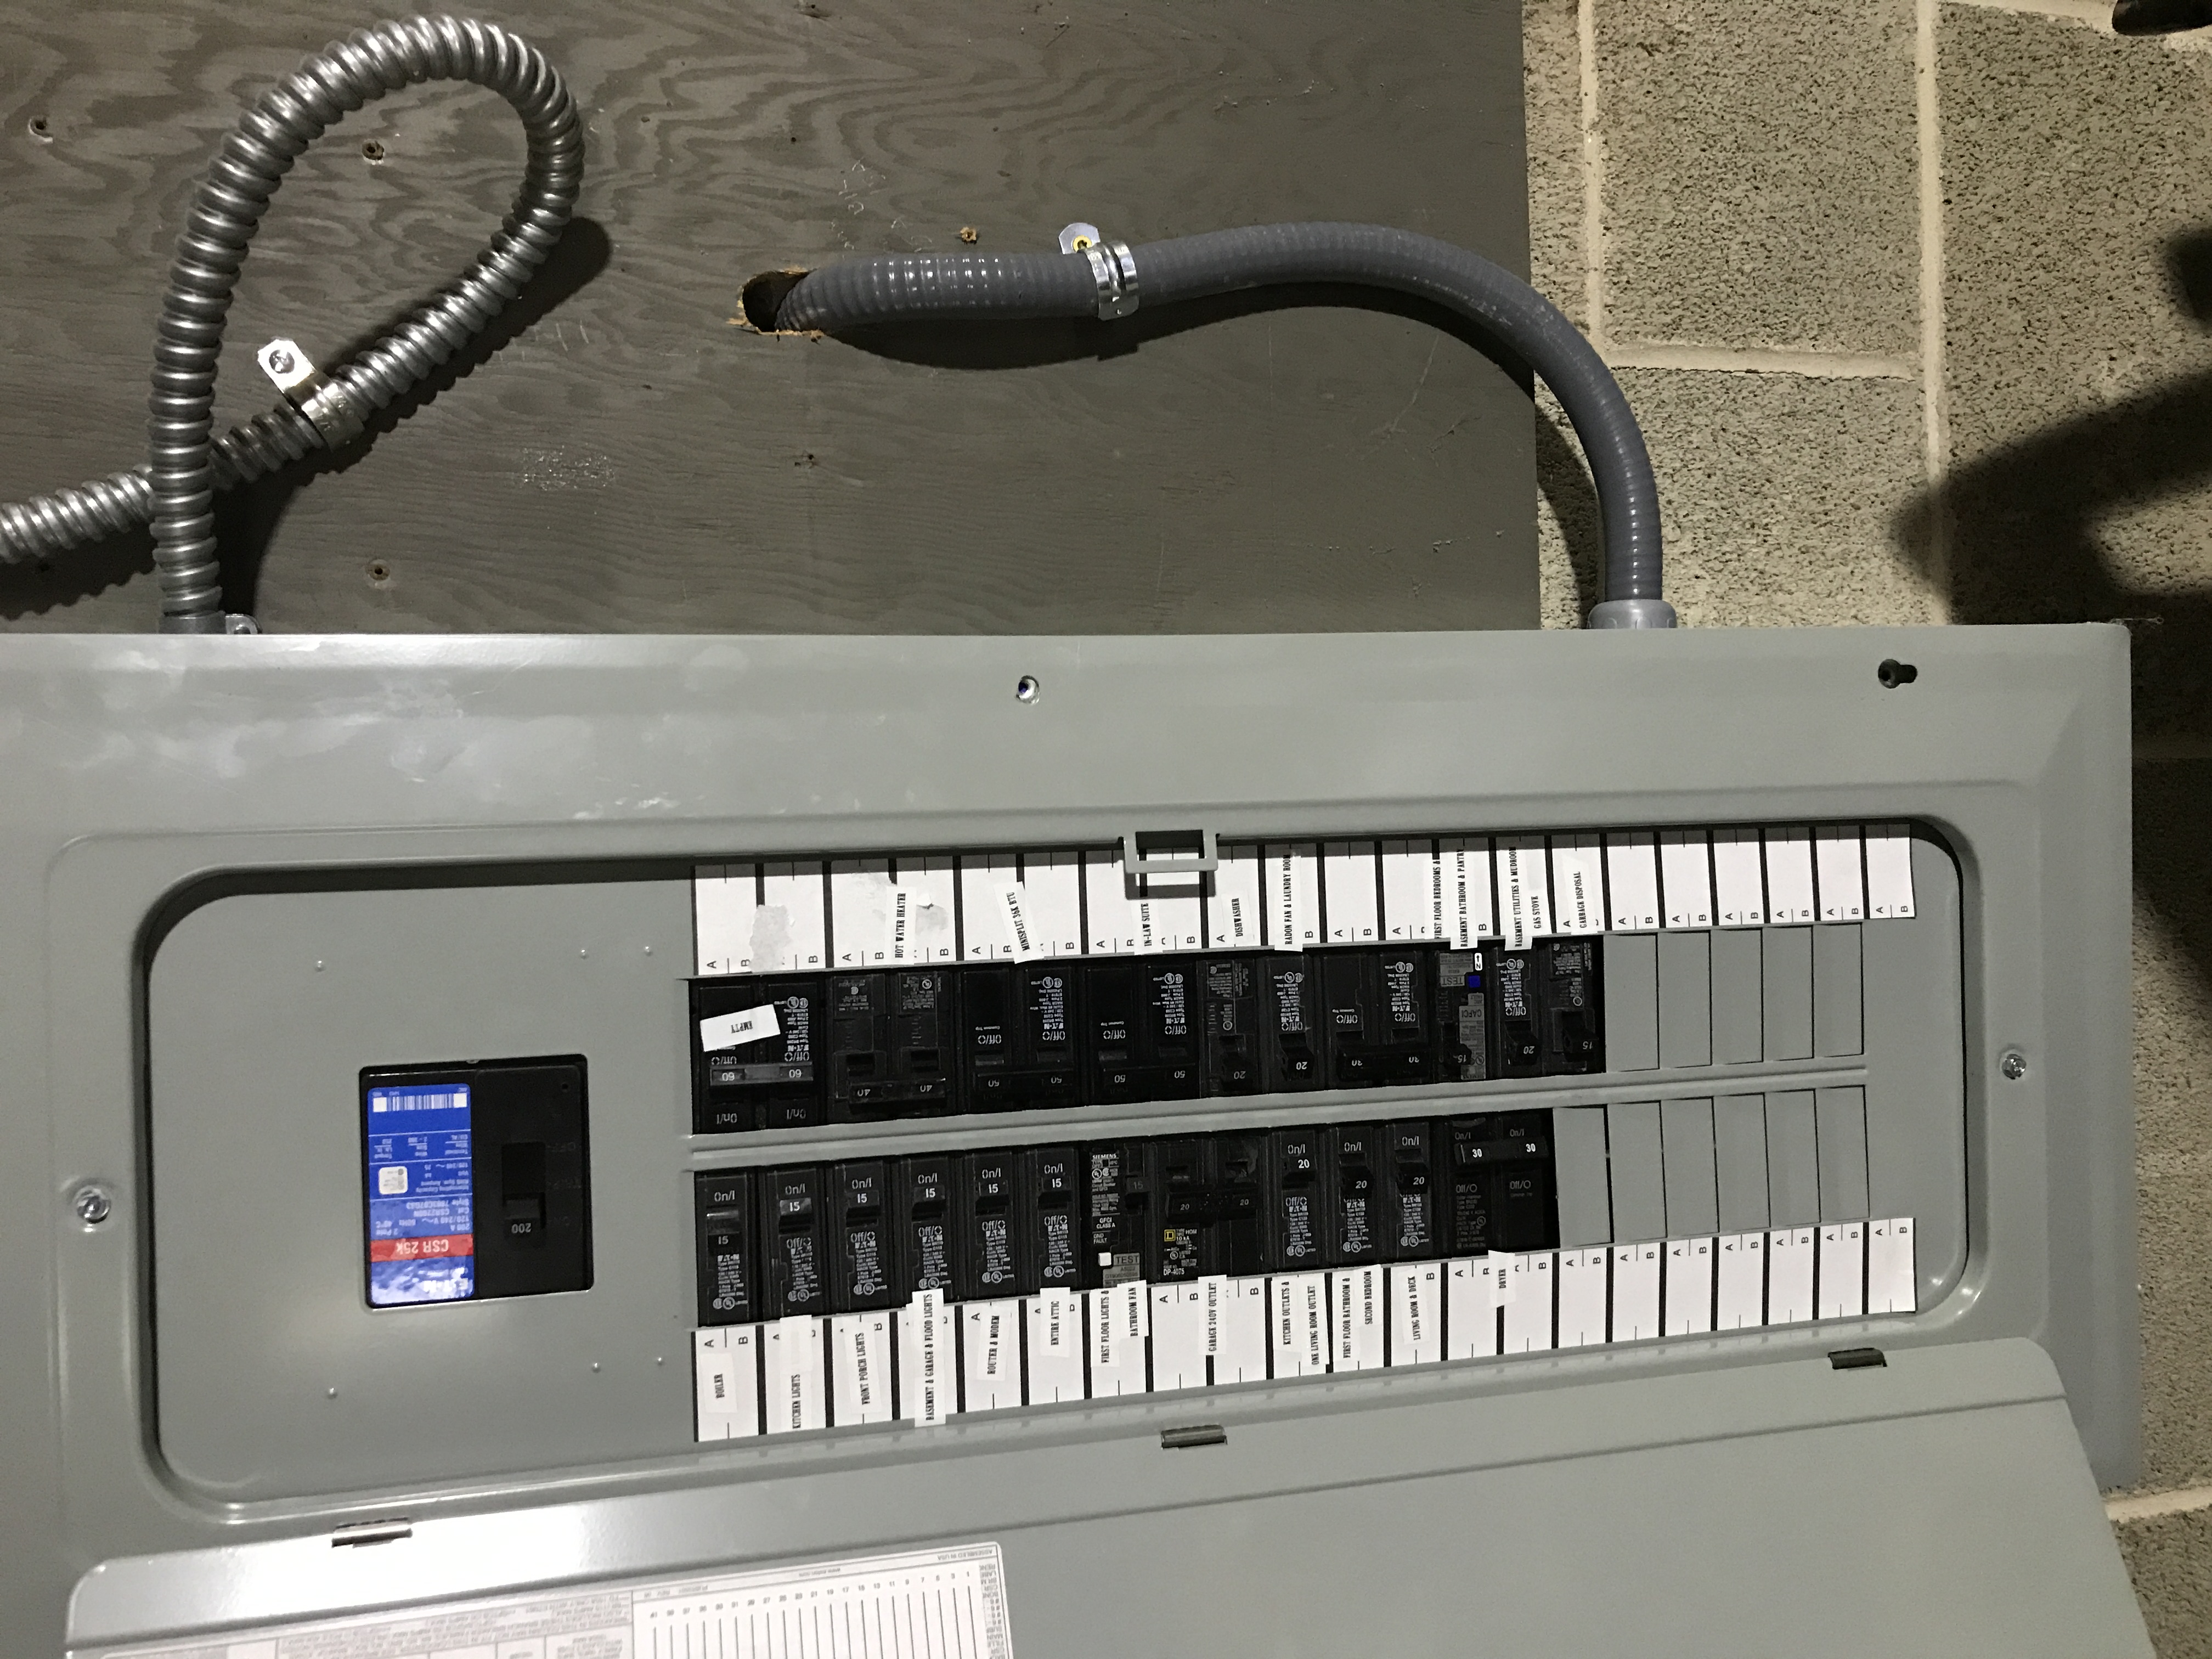
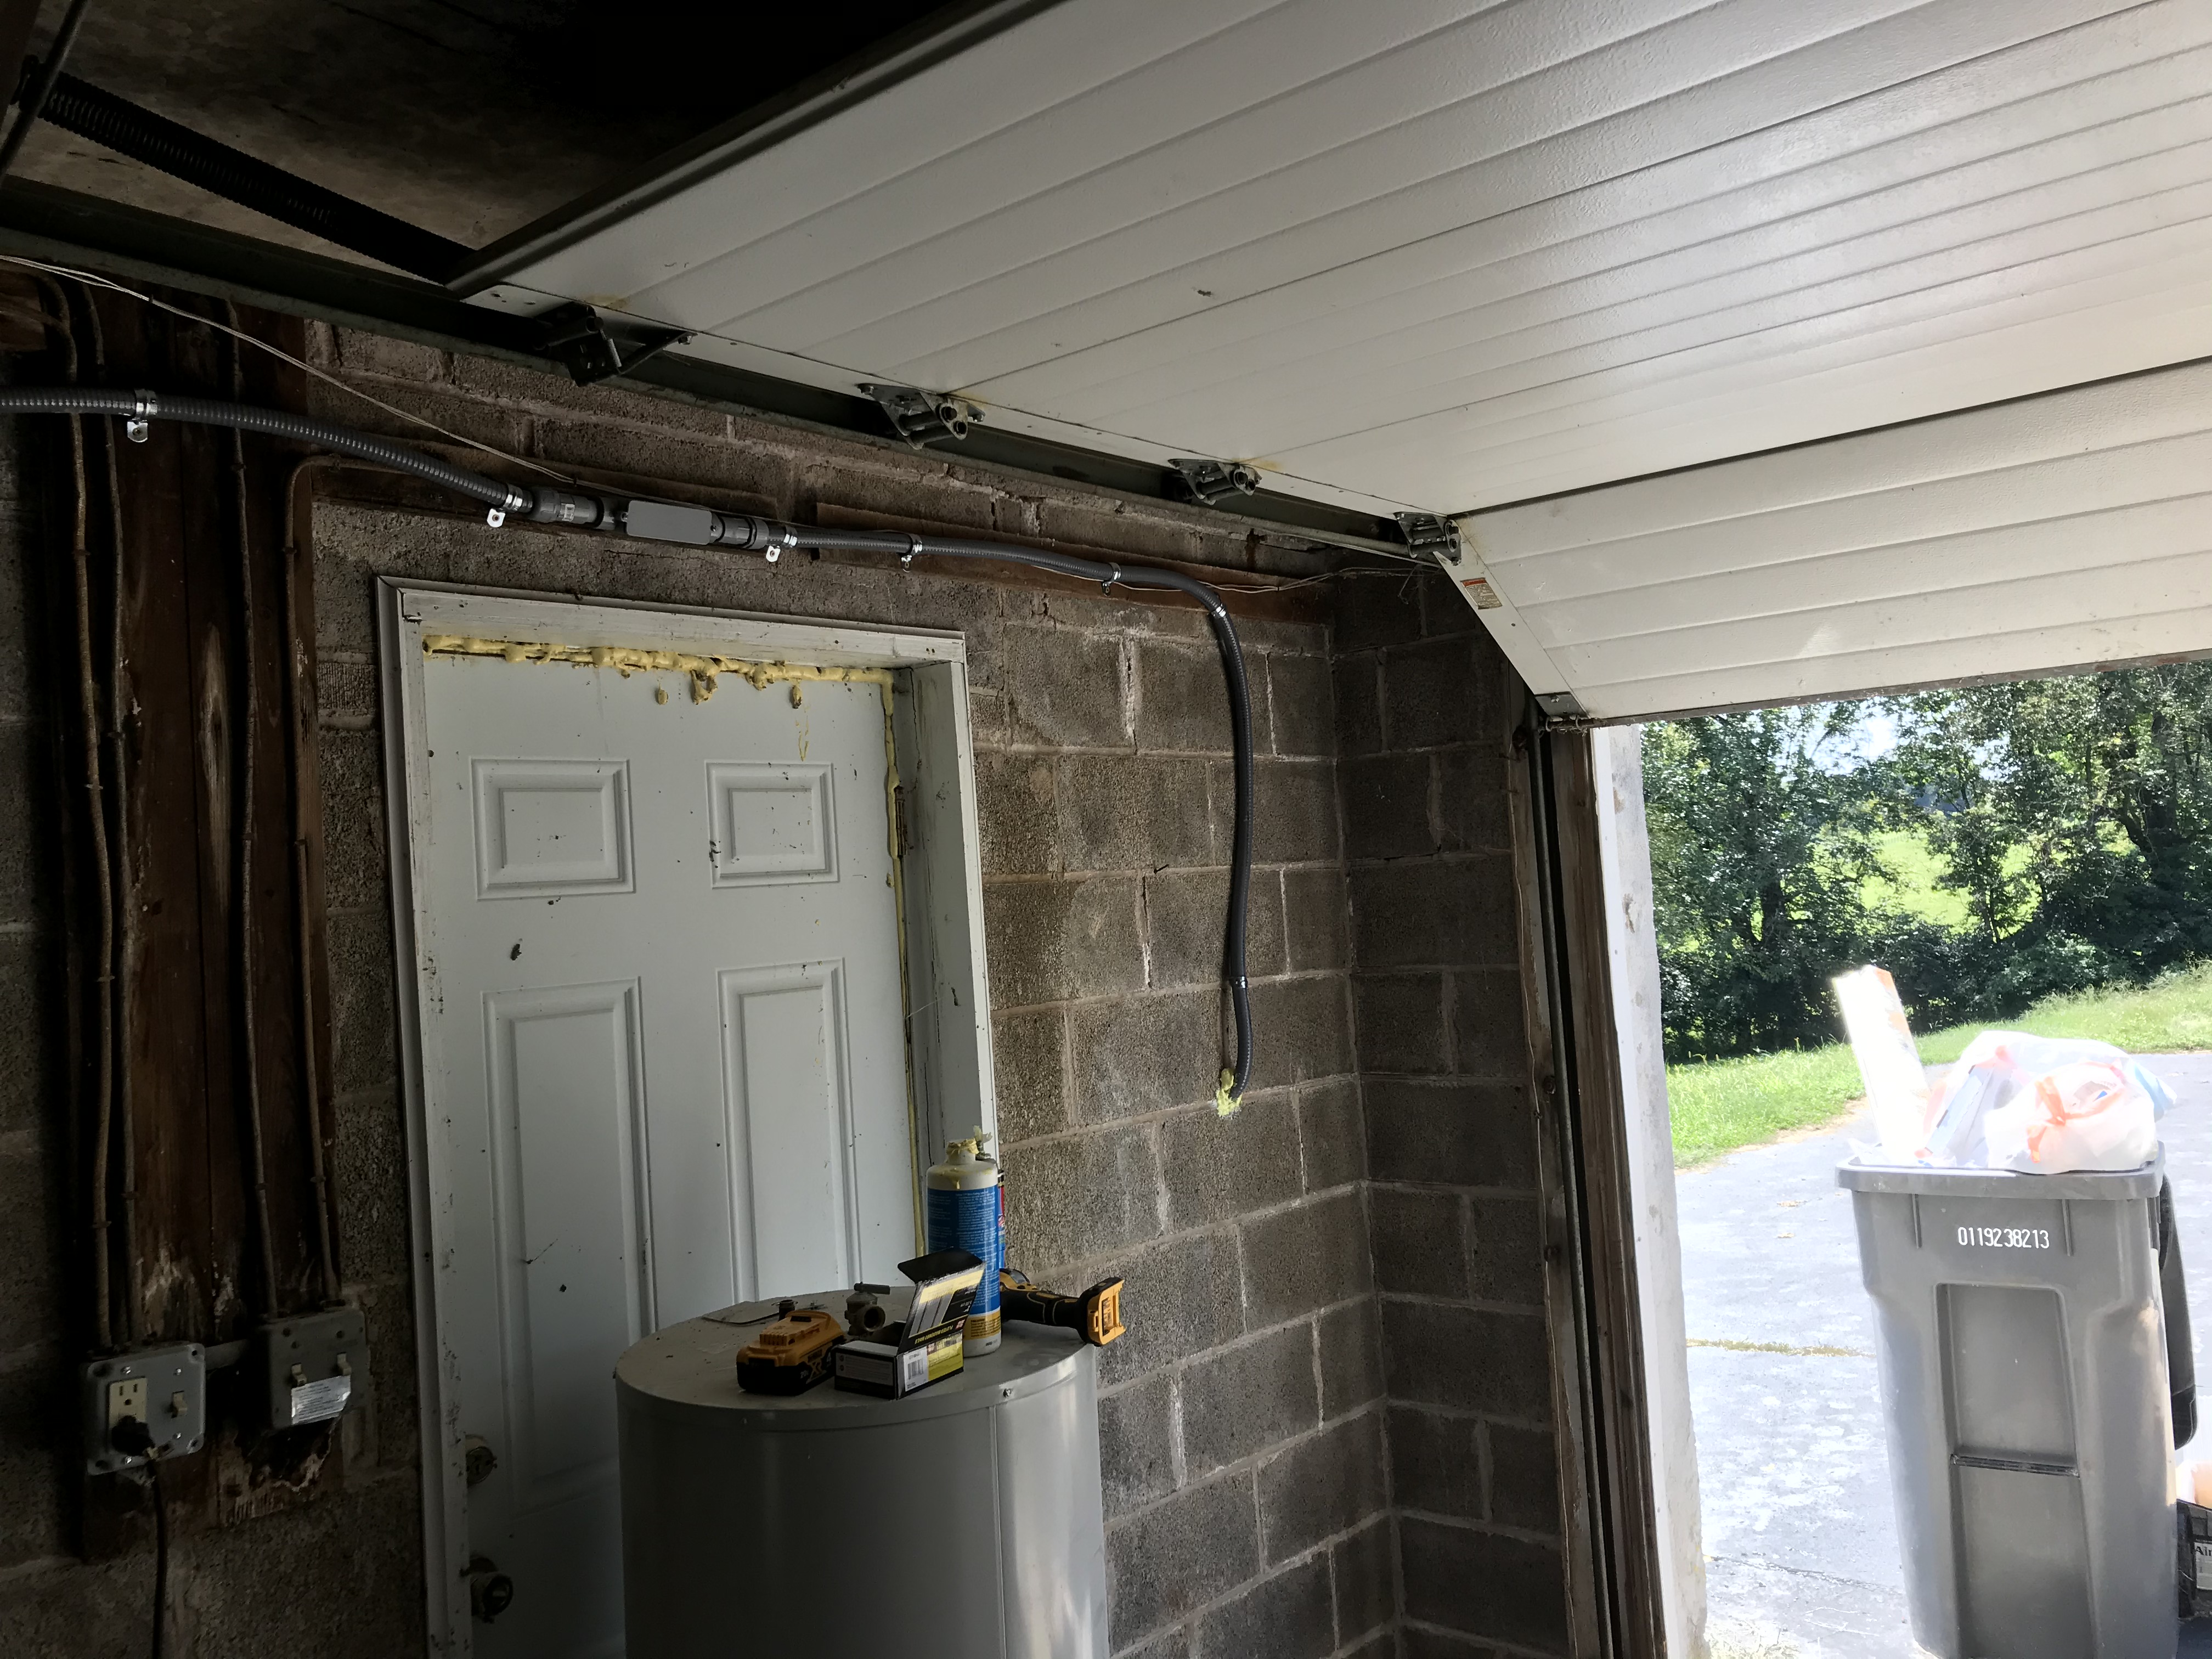
Finished Product photos
Interesting parts:
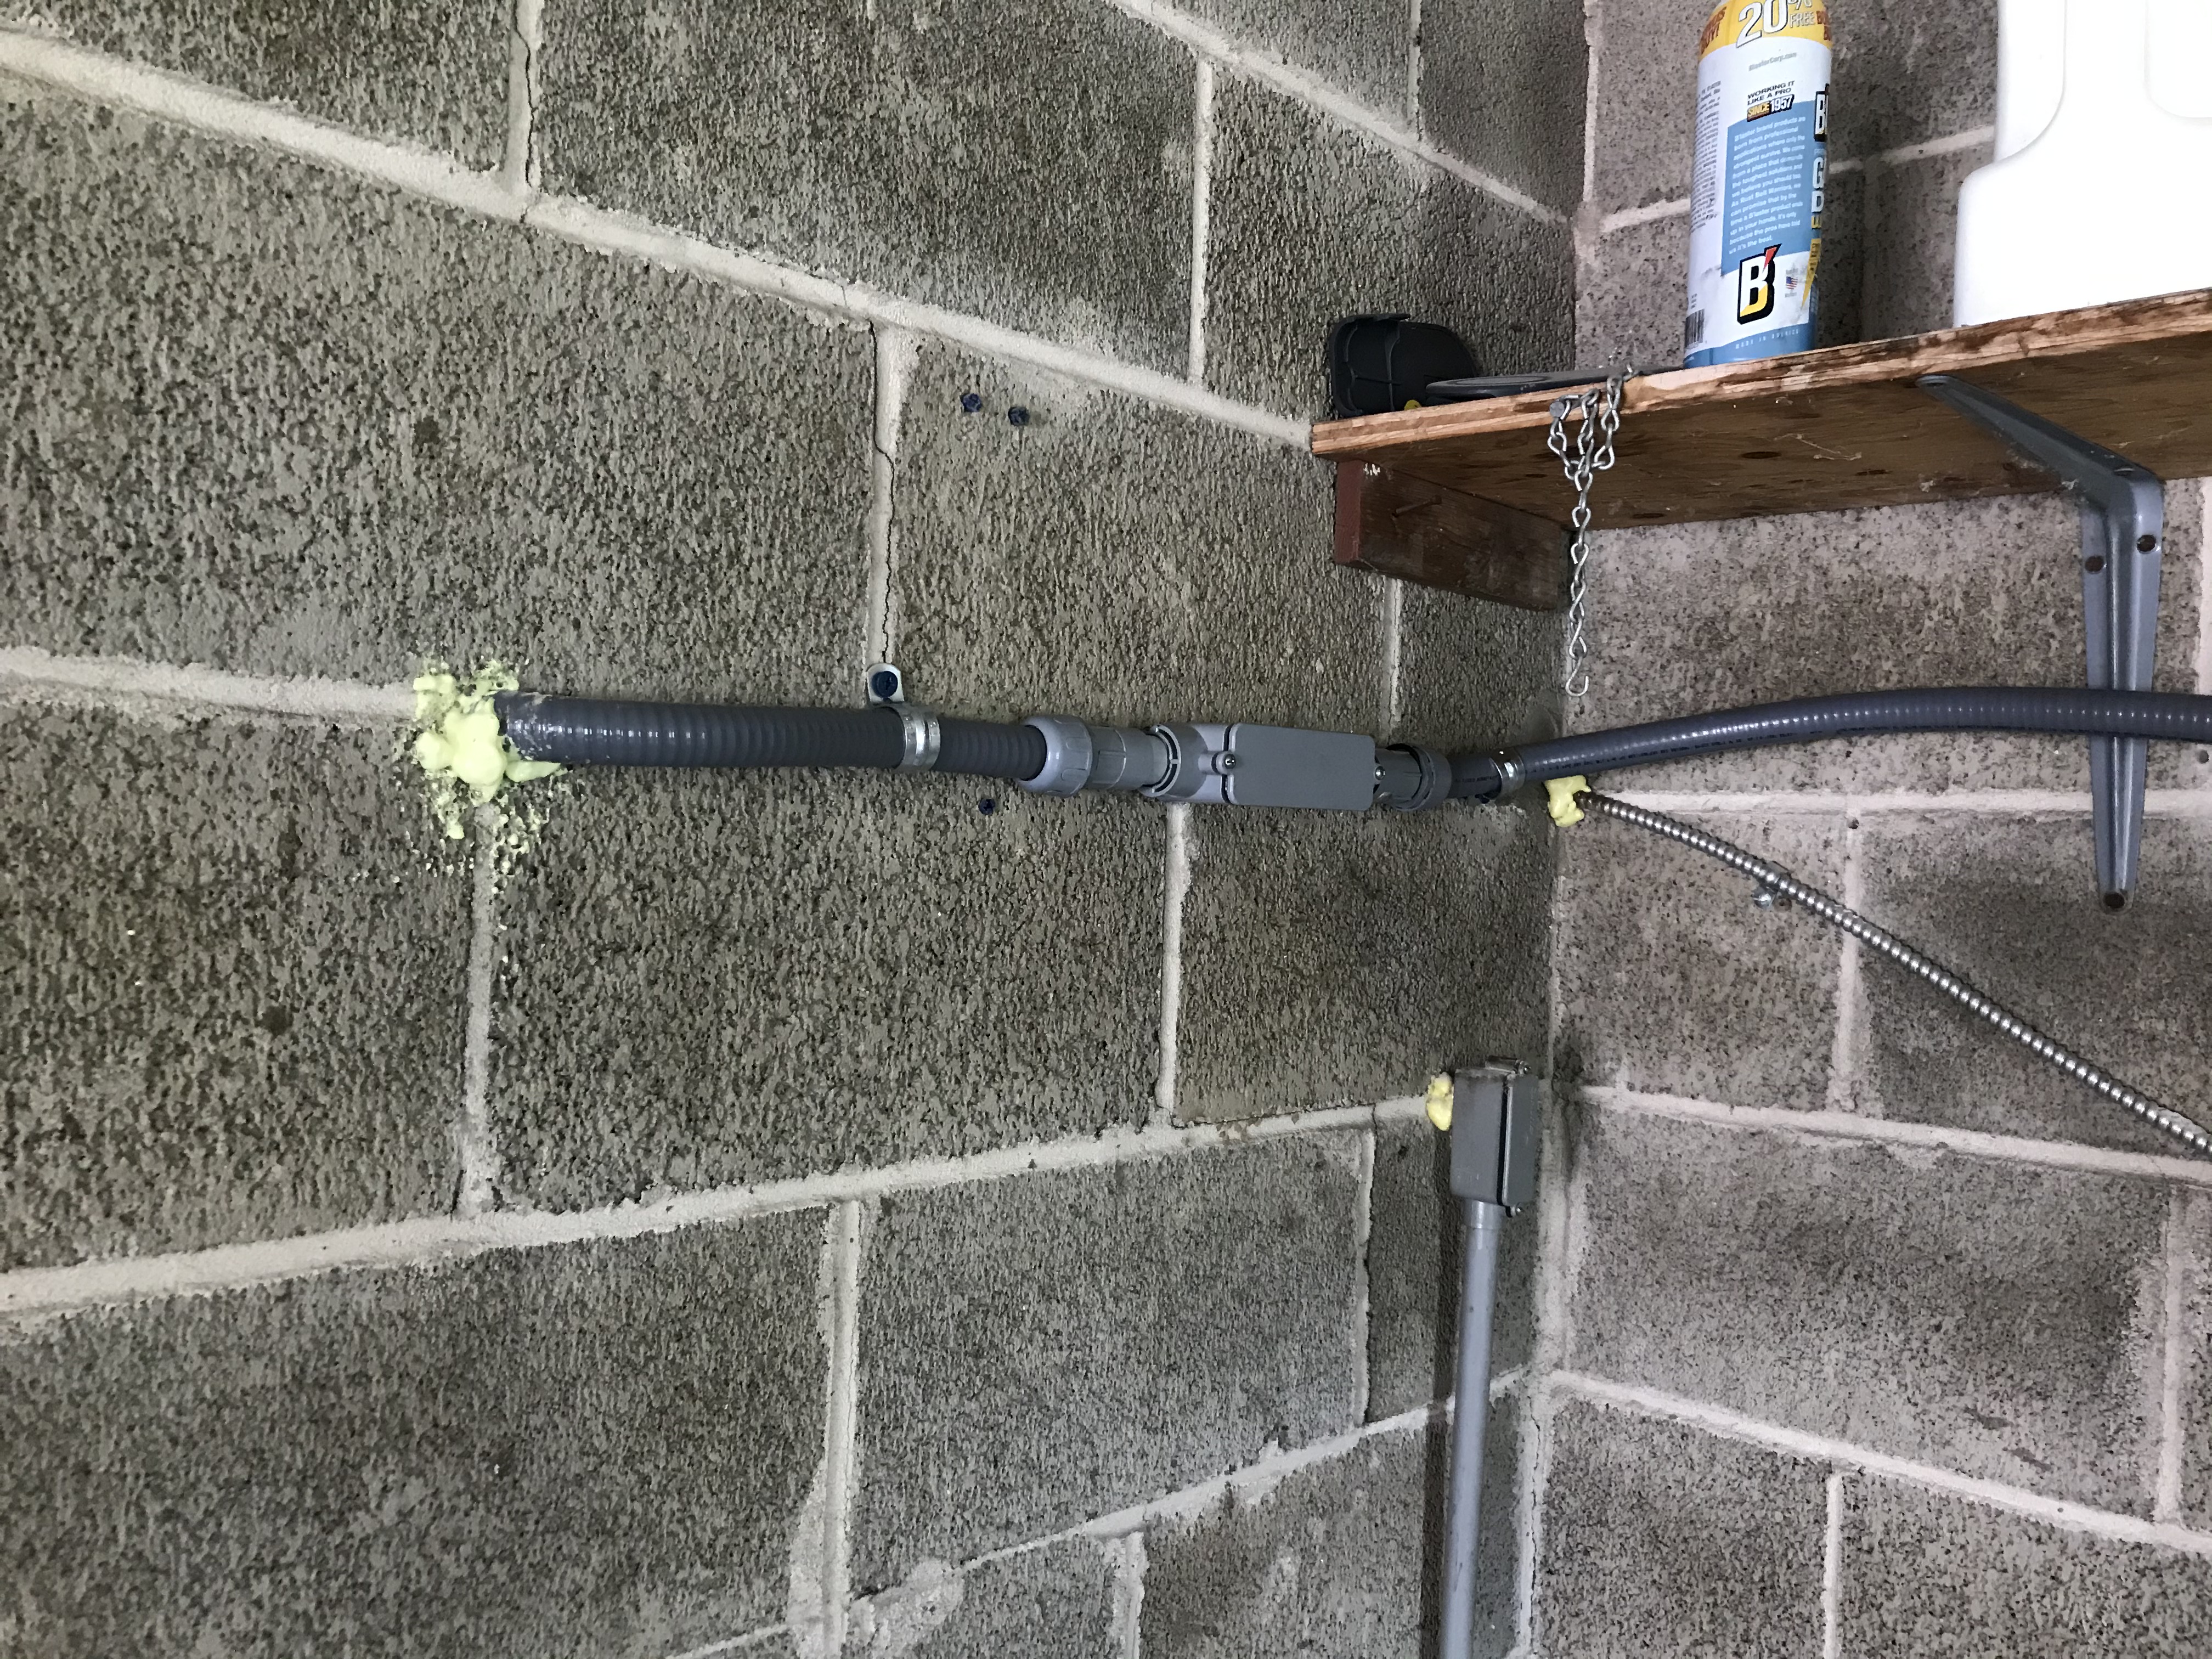
Conduit:
Why I did it
Lost power like 5 times within the first year living hear, more times than anywhere i’ve ever lived. The power lines run through a mass of trees so usually a tree falls on the line and disconnects it from the transformer. The longest I was without power was 3.5 days. Gotta love living in the country. After the 3rd time my dad bought a new generator and gave me his hand-me-down. I have a fair bit of knowledge of electrical work, so what I did was splice the cable and feed it into the panel with a breaker i had laying around. Worked, but i would have to run the line through a window and would let bugs in. This would take about 30 minutes to hook it up, and if it was wet outside it was a struggle. Needless to say this is not “to code” either.
Some notes before how-to
Most generator inlets are 30amps (or 50) with a “surge” which will allow more than 30 amps to pass through for a second or two. This is completely fine, your breaker will not trip, and wires can handle this surge for a second. Say the controller module breaks, and it surges for too long, then you will have heat build up in the line, which could cause a fire hazard. I know the likelihood of this is small, but i also wanted to make this “future proof” incase I want to install one of those big bad whole house automated generators at some point. Also go big or go home. You should use copper for this project because aluminum can corrode overtime, no matter how water tight your box is, water will always get in. So go with copper for exterior electrical projects.
How I did it
The worst part of this was boring the holes through the stucco and concrete block. I was very cheap and just used what i had laying around. I had 4 bits of increasing diameter, and got it up to about half an inch. I needed a full inch for conduit clearance. I took a chisel and broke apart bits of the wall after that, couldn’t get it even through to the other side of the block. I had a galvanized iron pipe laying around (courteous of previous owner). I took the pipe, and a sledge, and hammered it the rest of the way through until i was clear of the other side. Luckily living with 5 acres means i have no neighbors to question my idiocy. I did this twice, once for the panel, and once for the inlet install.
I like to keep things identical with electrical code for future inspections. Before any electrical project i read about what i’ll be doing fully. For running electrical lines through an unfinished area you must have a conduit to protect the wire.
- Punch the holes for the inlet - drill, many drill bits, iron pipe (see above) - this would be easier if your house isn’t stucco or block.
- Measure length of wire needed, cut, then run through conduit. - electrical lubricant (or fishing wire), wire cutter, patience
- I didn’t bother with a fishing wire, i just forced it through the conduit fitting with lubricant, took some raw strength, and i hated my life for a solid hour
- Install inlet - level, conduit fitting, pliers, exacto knife, drill, caulk, some anchors
- choose where you want it, put the box up with a level, and drill the holes.
- put the anchors in the holes with some caulk, prevents water from getting in wall cavity, then fill anchor with some caulk too.
- screw the box into the anchors, caulk around the screws, then cleanup the caulk to give it a clean look
- attach the inlet conductors to the wire.
- close up box, pushing wires in first to prevent a fallout.
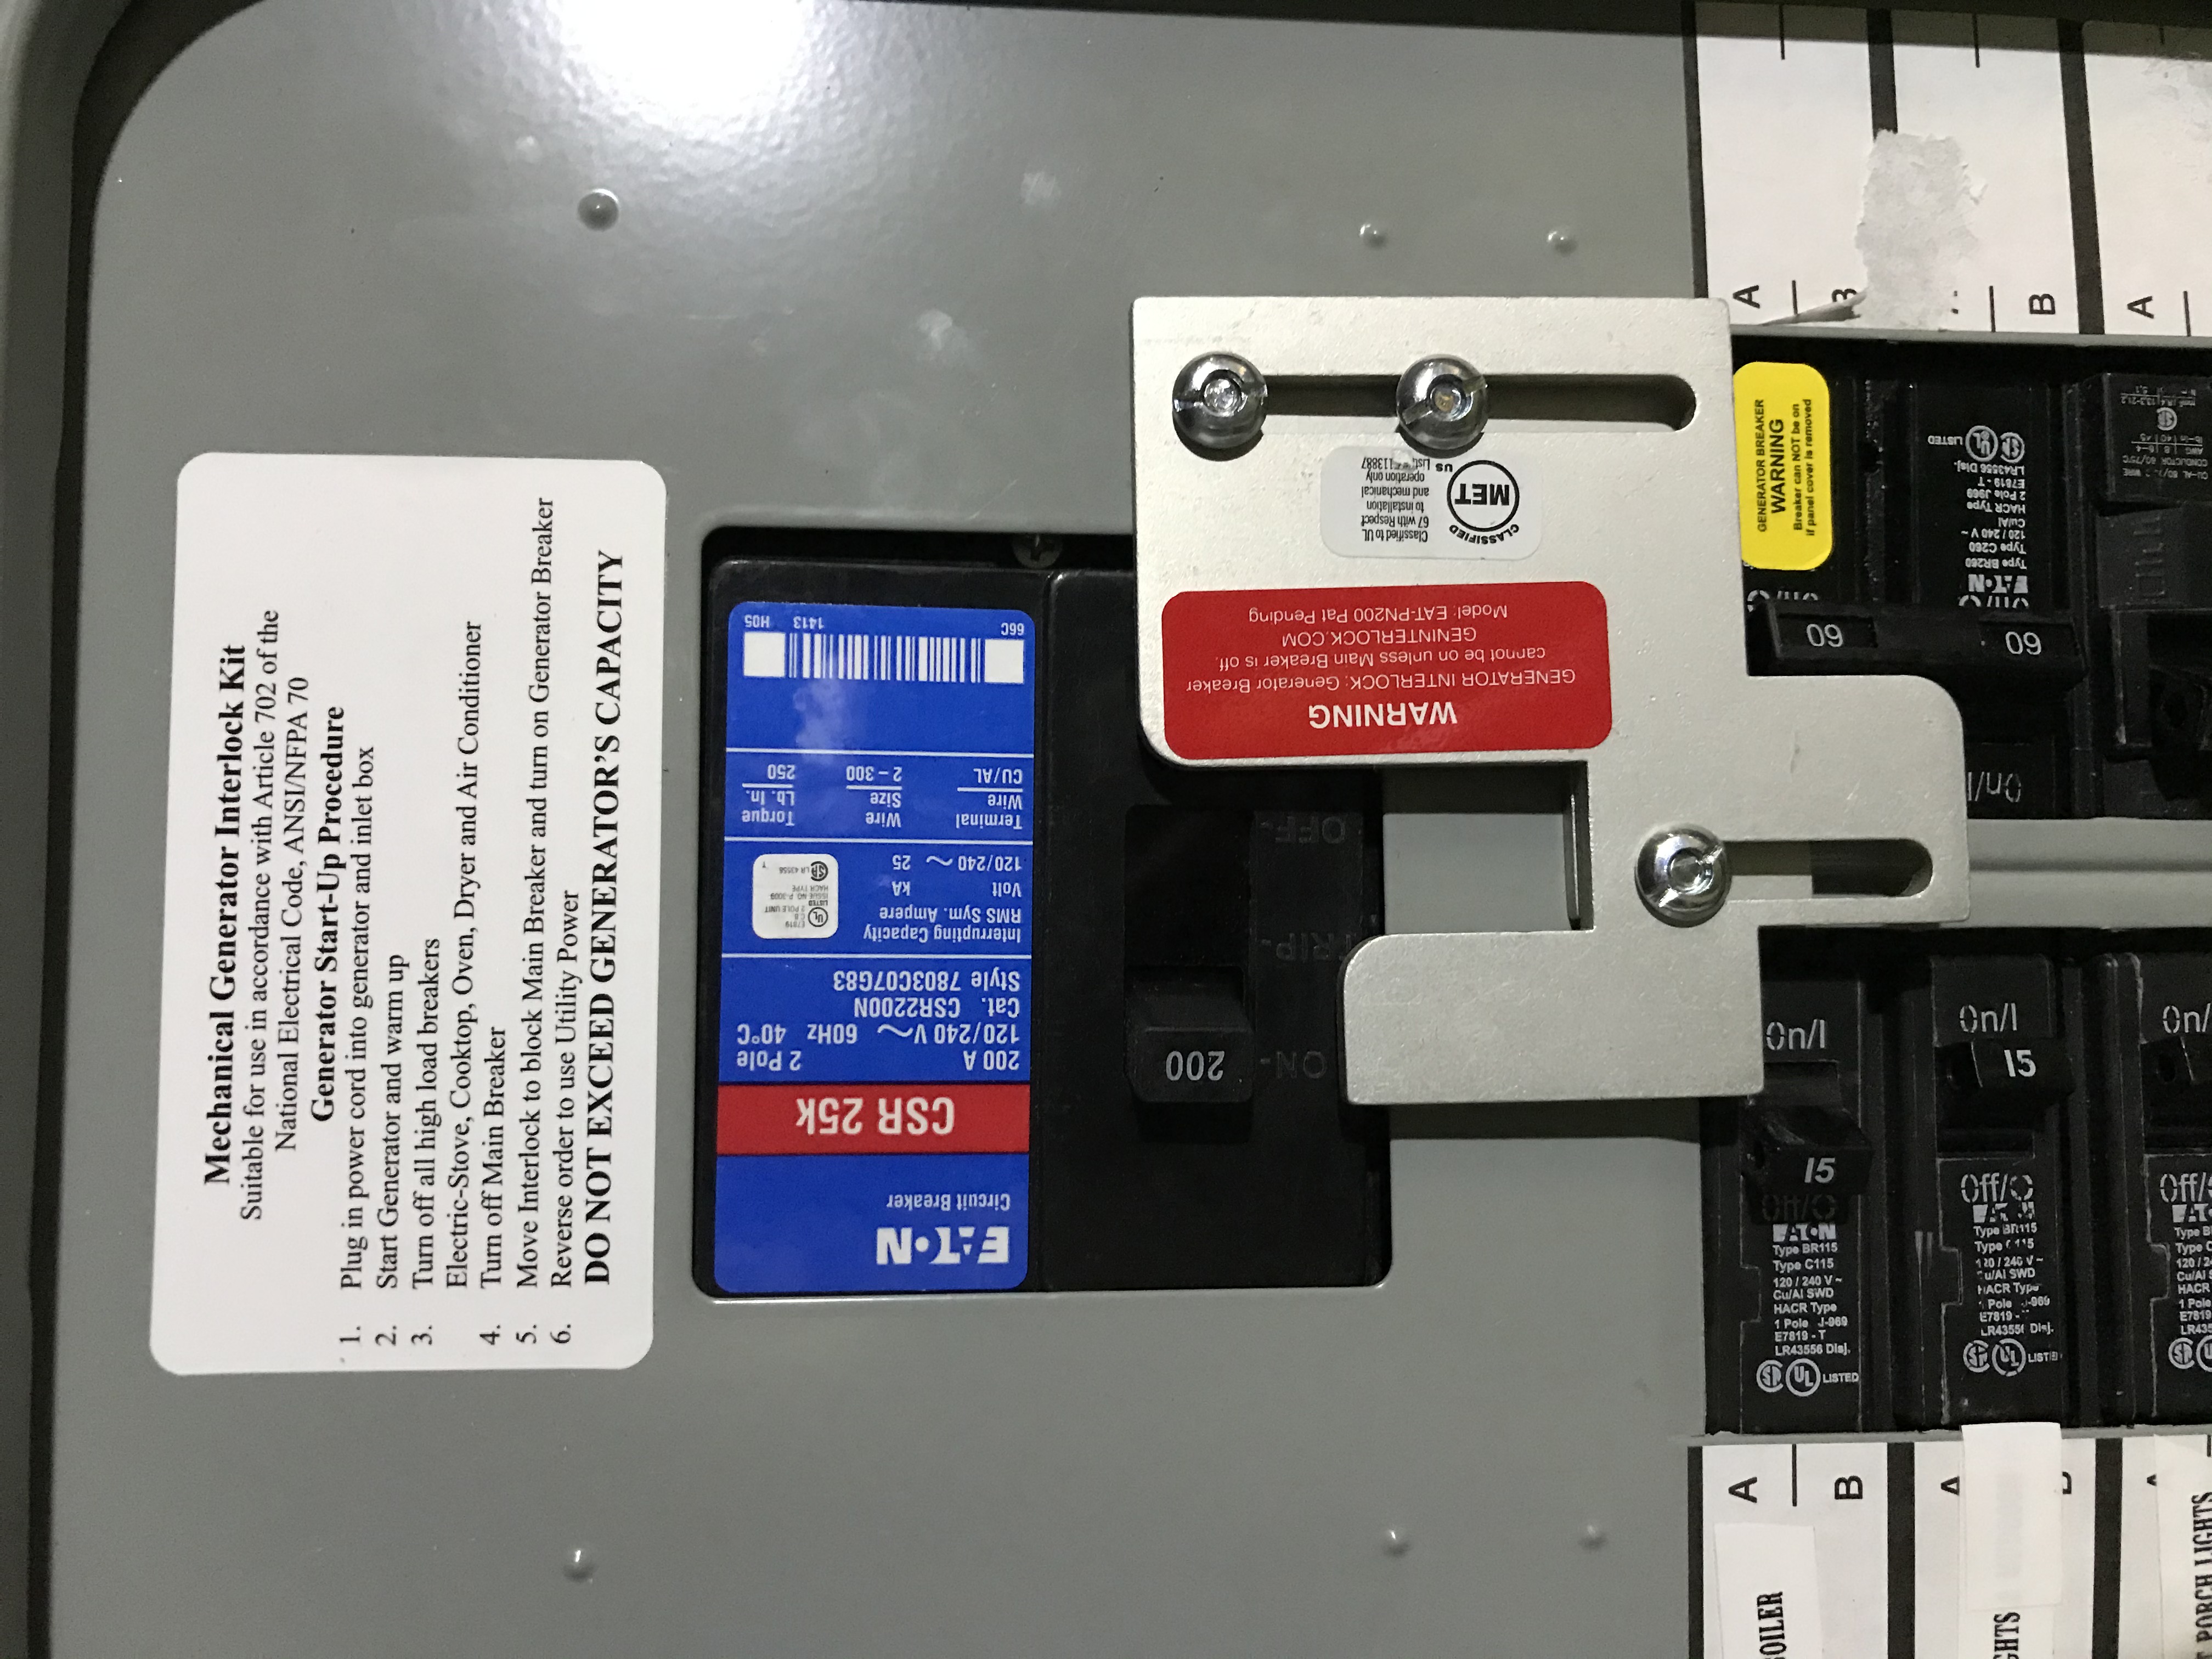
- Install Interlock - drill, interlock kit and assembly, pliers
- Directions come with interlock kits they’re all different. But something that no one ever notes is slapping some di-electric greese on the breaker in the back - it prevents corrosion of the bus bar to your breaker, and takes 1 second to do. Just be sure to slap that on before you do it
- Also because the gauge wire I had was so large I could not put my neutral wire into the neutral bus bar. Luckily i had a “double up” nut i was able to use to get it to attach to my busbar
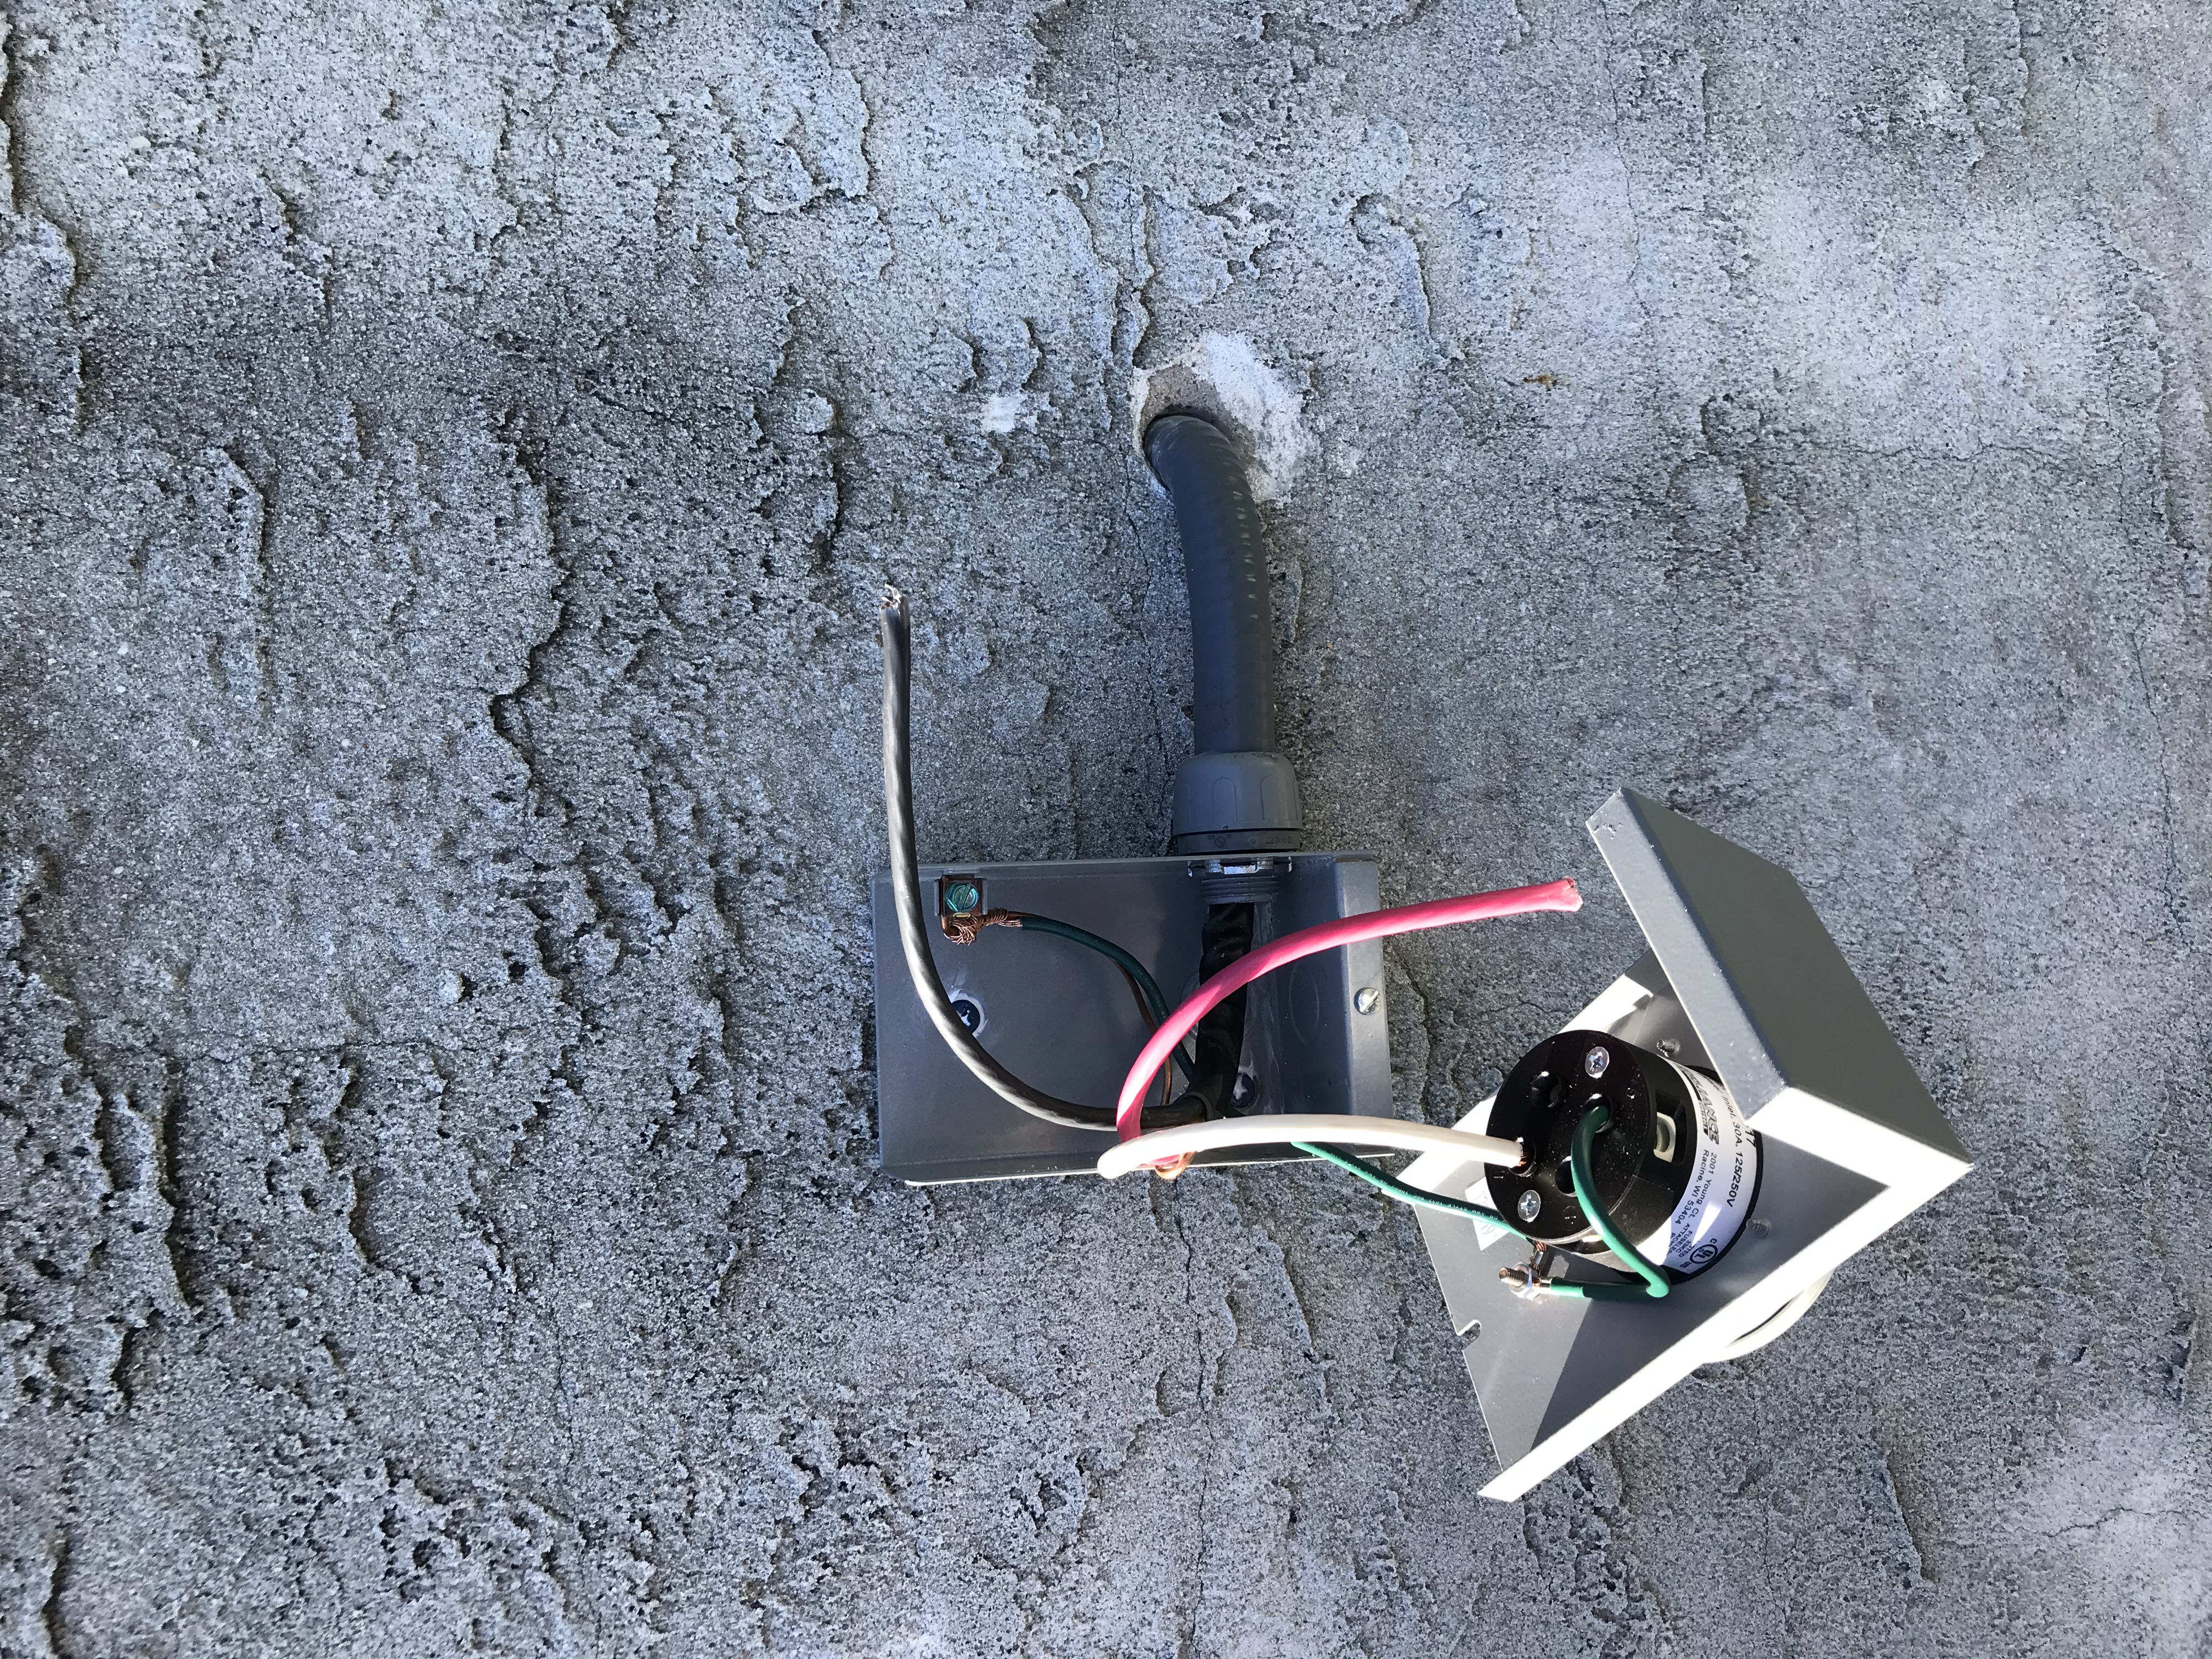
Wiring photo
Here’s a bonus photo of the wiring, this kit by reliance was a chinese piece of crap that fell apart when i went to clamp down the wire. I had to reassemble the entire thing from scratch. By the time i got to the point where i got 1 wire to clamp i got excited and took a photo.